Watch-folder setup - AWS S3
How to configure watch-folder on AWS S3 for use with Telestream Cloud
If you’re processing a larger volume of files through Telestream Cloud one of the first things you will want to do is to automate your workflow. The easiest way to do it is to use watch folders.
The idea behind it is very simple. You specify a storage location and tell Telestream Cloud to monitor it for new files. For example, you may create an S3 store in our web console, then enable it as your input store. Any file uploaded to this location will automatically trigger media processing workflow, e.g. start a transcode using Flip service and delivery to output store once finished.
Creating source bucket
Lets' create the source bucket which will act as the watch folder. For this tutorial we will use IAM role as a way to grant Telestream Cloud access to your bucket. When logged-in to AWS console go to S3 and click Create Bucket.
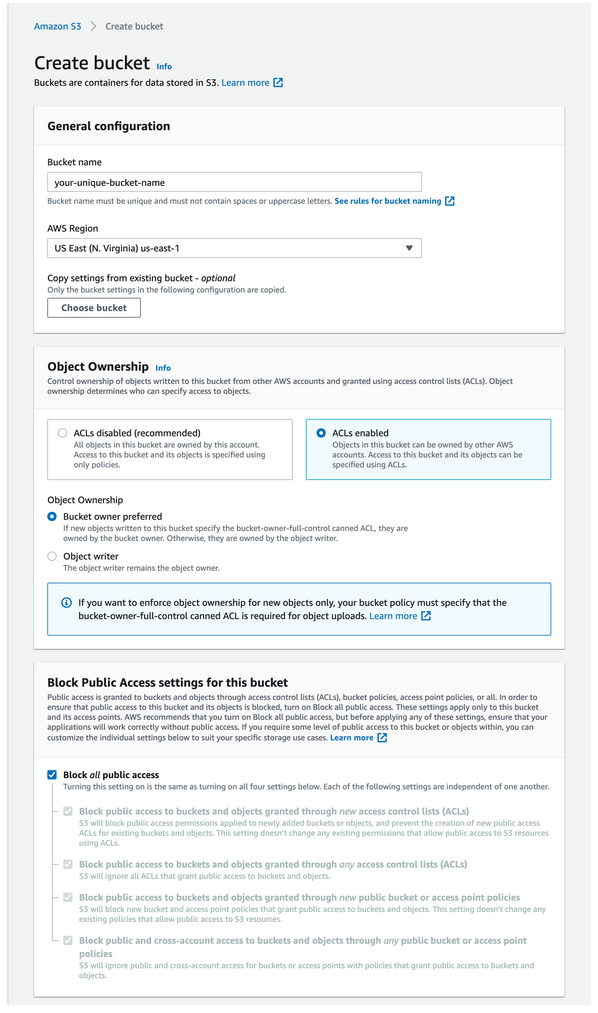
Give your bucket a name which describes its purpose - e.g. input-bucket - and select region where you want to store your files (preferably somewhere close to your source content). Keep "Block all public access" checkbox on.
Granting access using IAM Role
IAM roles are AWS identities not associated with one specific user but can be assumed by anyone permitted and have defined policies which determine access rights to your resources. Each roles is identified by Role ARN (Amazon Resource Name) which you will need to provide when adding S3 store to Telestream Cloud.
Create IAM Role
To create a new Role from scratch login to your AWS console and from the Services menu go to Security, Identity & Compliance > IAM > Roles and click Create Role.
By default, the token expiry date is set to 1 hour. It is recommended to change this value to 24 hours so that the generated pre-signed URLs are valid for one day.
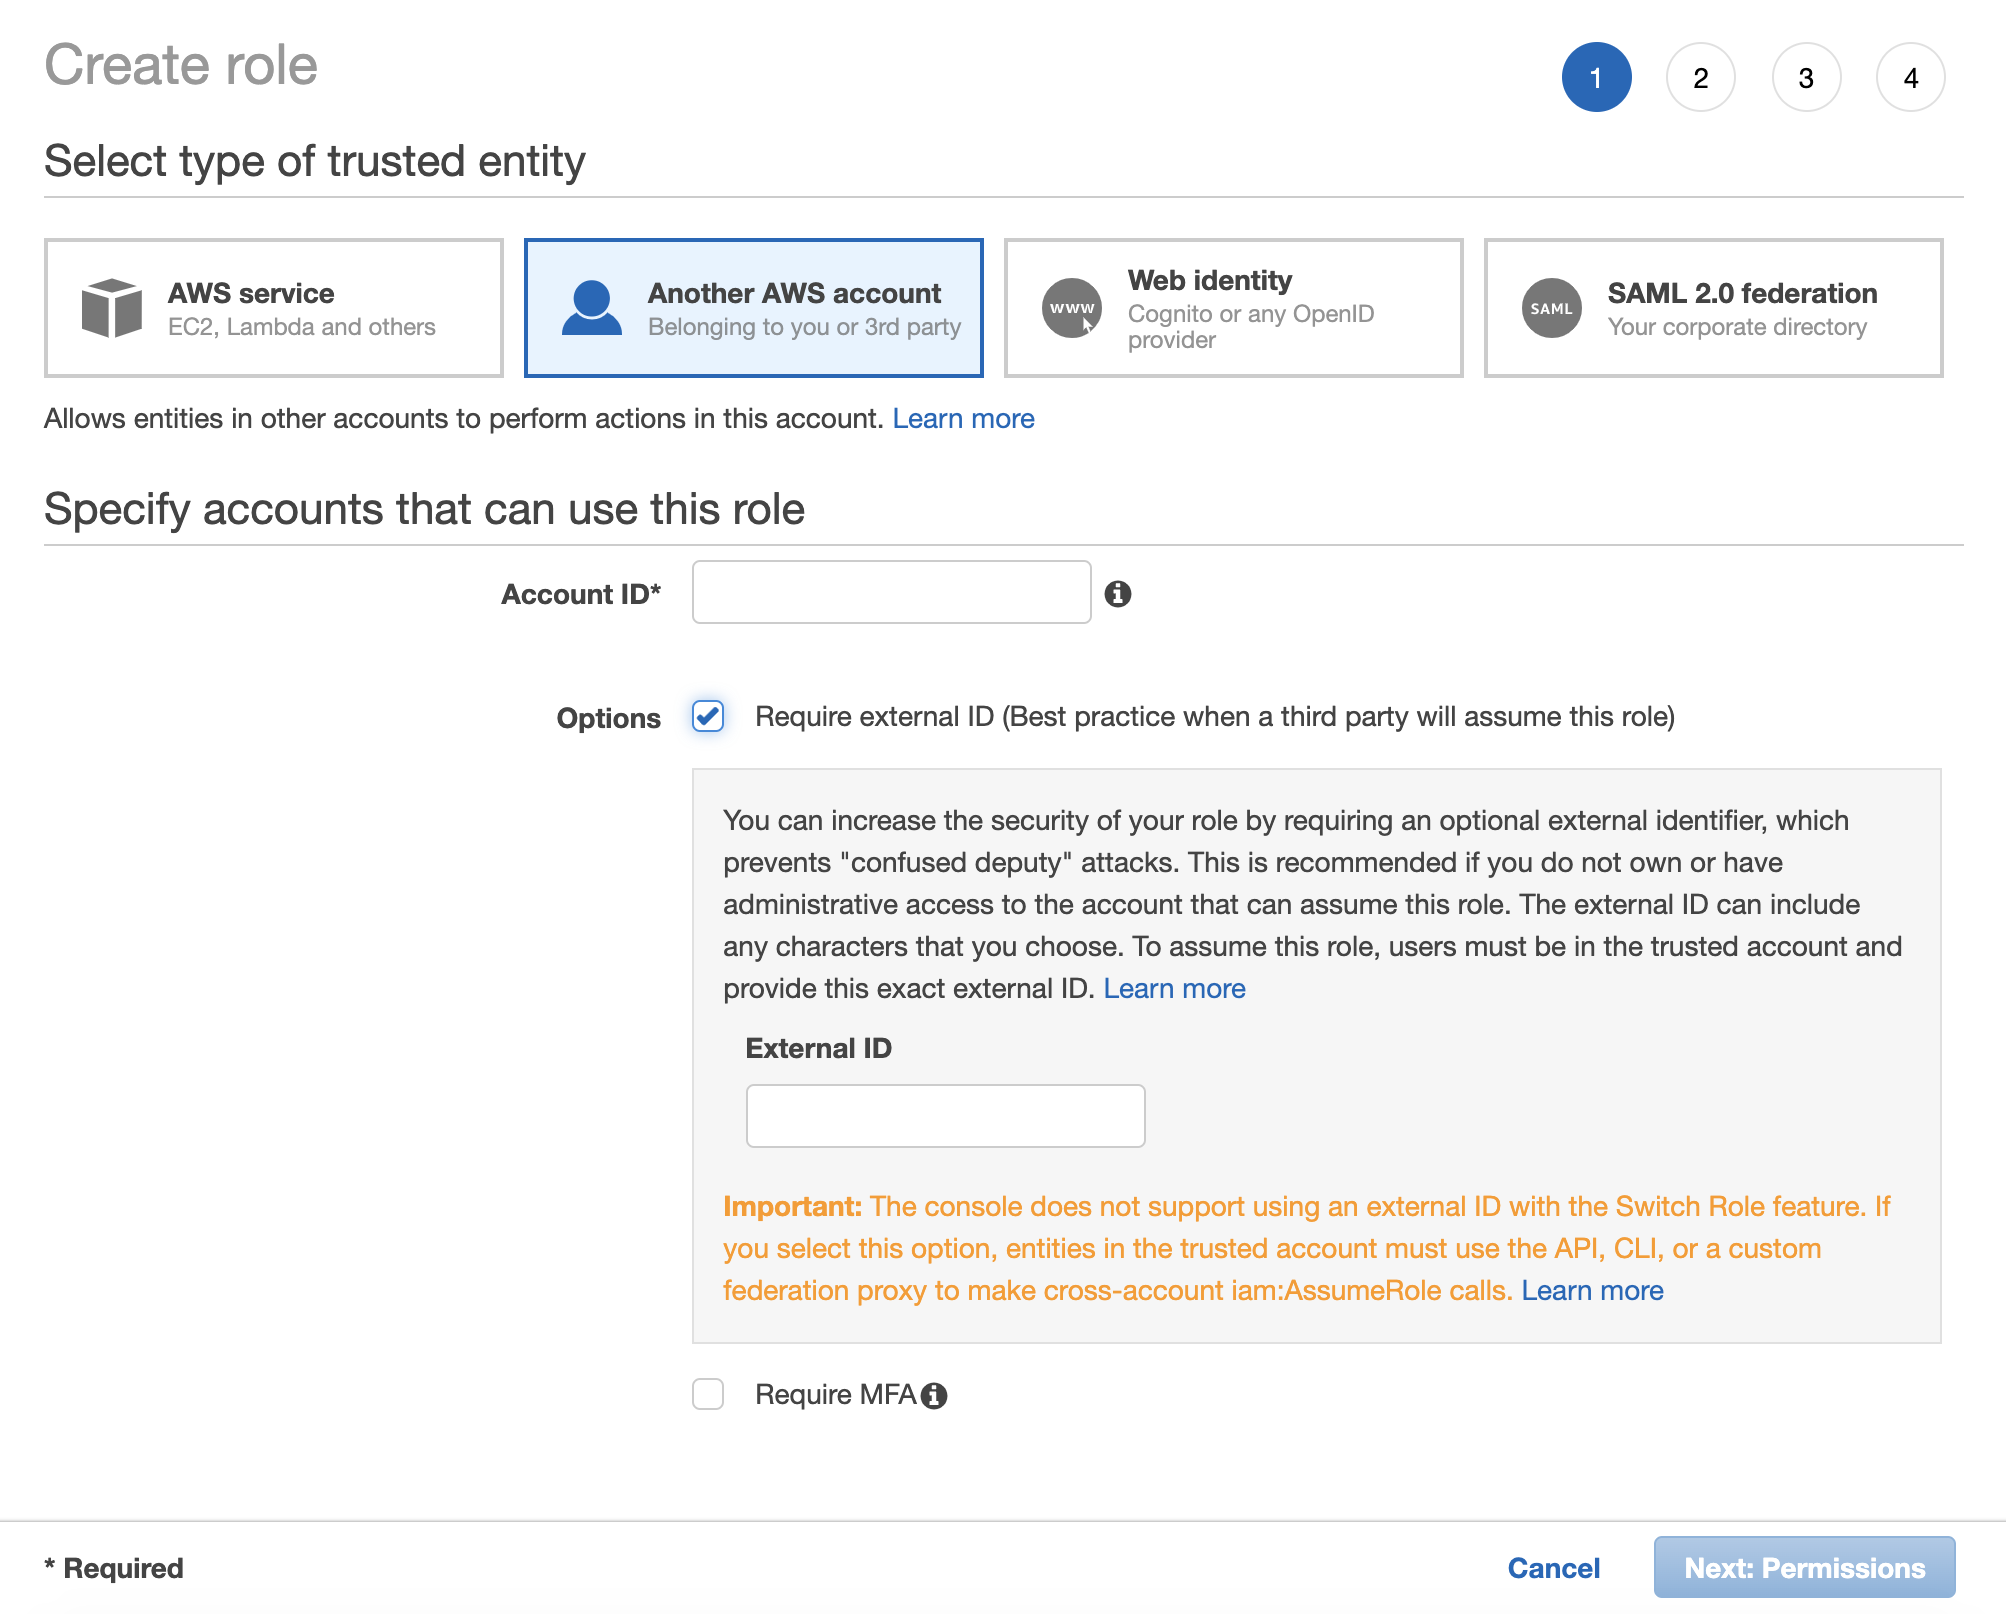
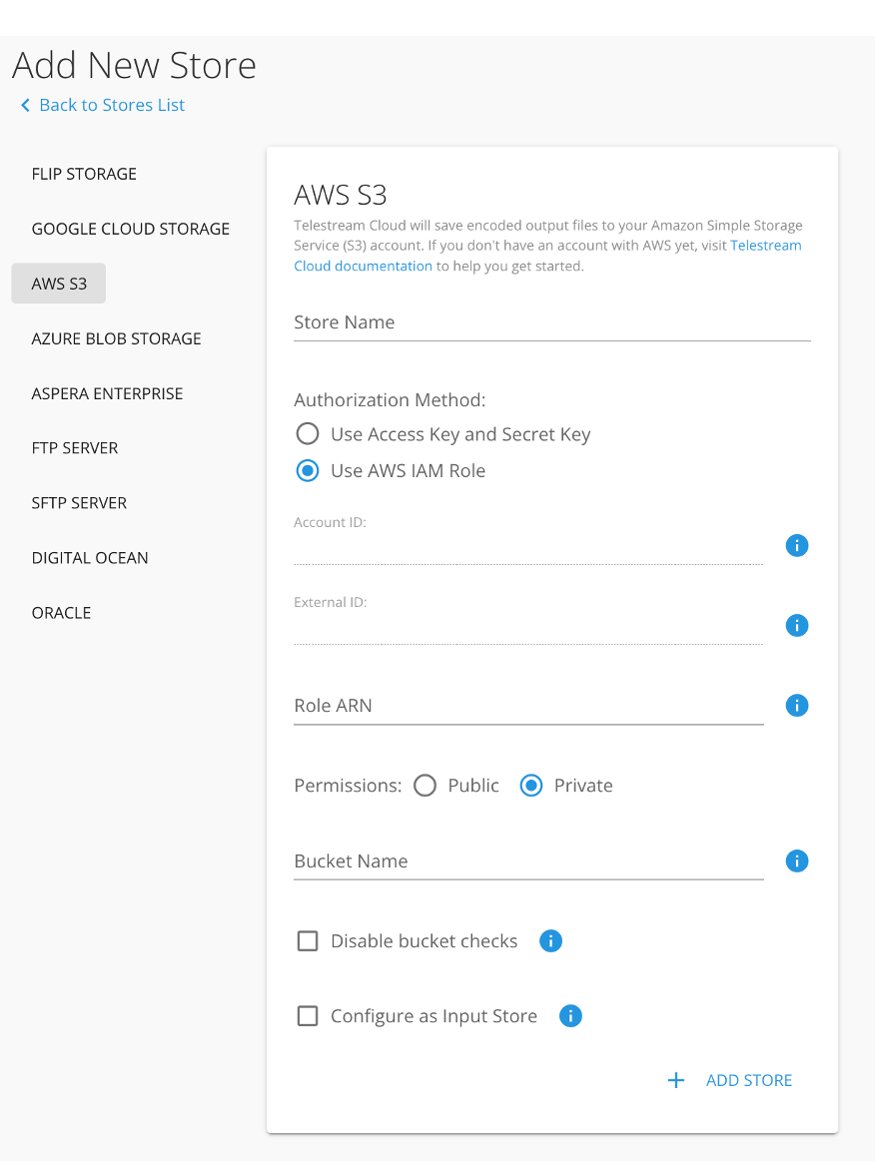
Account ID identifies service that is allowed to use this role, in this case Telestream Cloud. We also require an External ID as additional security measure. To allow us perform actions on your account use values from the store configuration form:
Check IAM user permissions
Important: make sure that IAM user that creates the policy has sufficient privileges to grant required rights. While AWS will allow you to create the policy anyway, it doesn't mean we will be able to access the bucket.
Click "Next: Permissions" to go to defining permission policies. You can either use one of the templates provided by AWS (Amazon S3 Full Access policy provides full access to all buckets) or create your own.
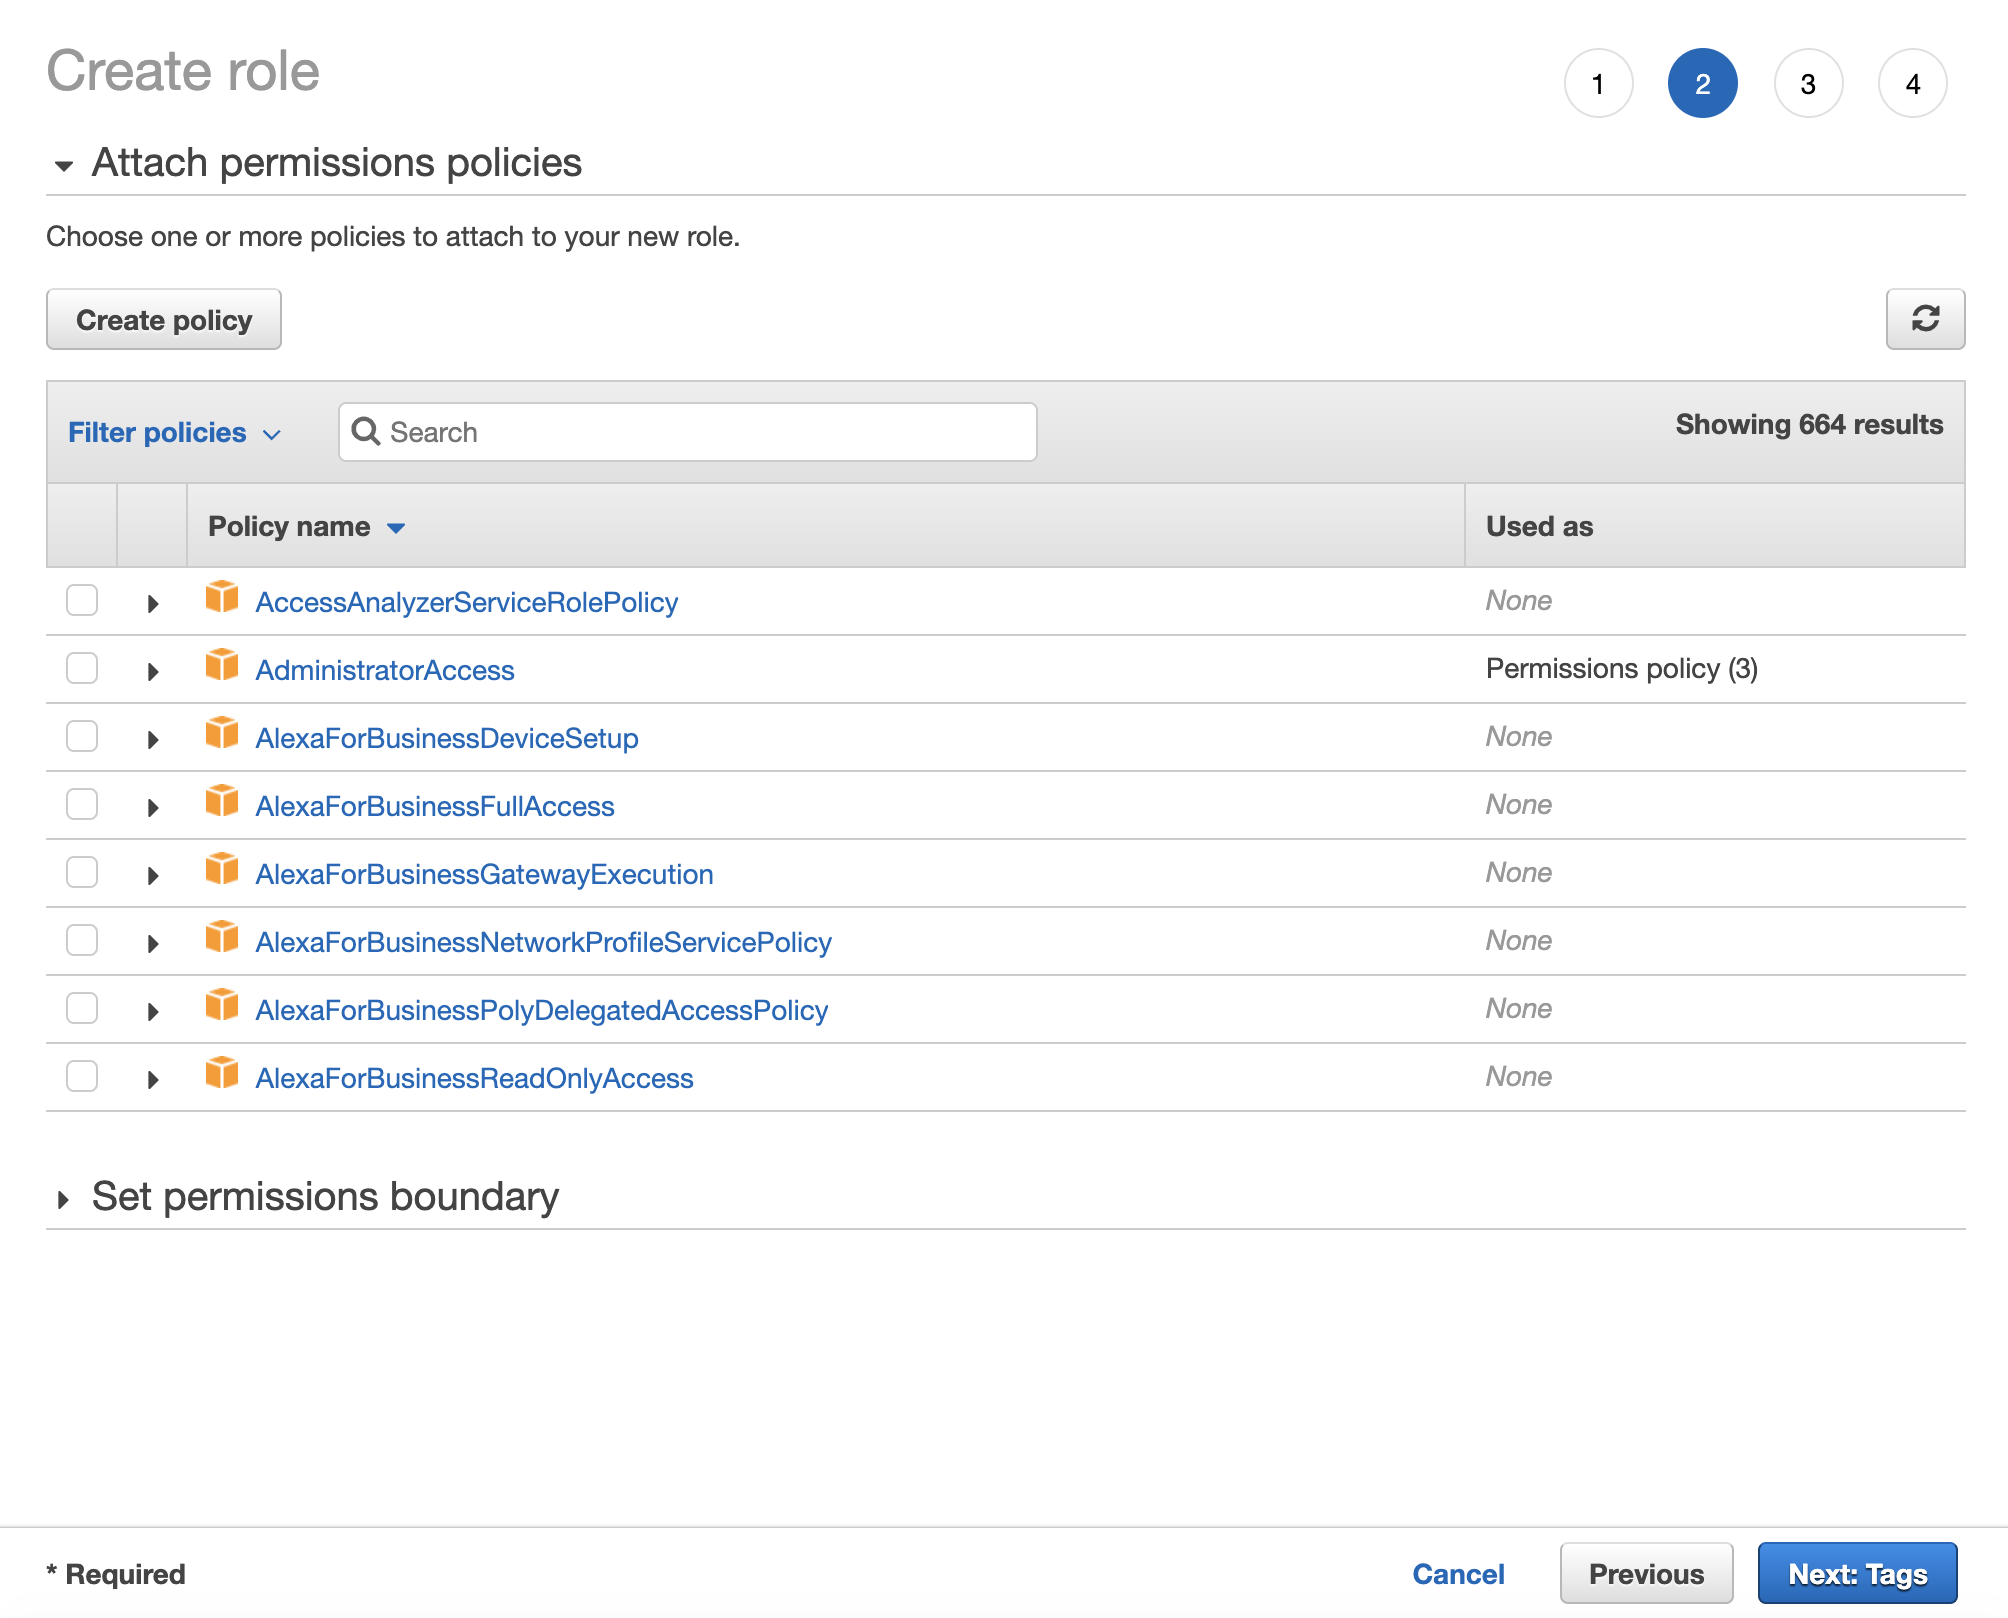
Click "Create Policy" and new tab with config form will open. When creating a policy select S3 as service and either select actions in visual editor or use JSON for that.
Here's an example JSON code (remember to replace YOUR BUCKET with the actual name of the bucket you will use):
{
    "Version": "2012-10-17",
    "Id": "PandaStreamBucketPolicy",
    "Statement": [
        {
            "Sid": "Stmt1",
            "Effect": "Allow",
            "Action": [
                "s3:AbortMultipartUpload",
                "s3:GetObjectAcl",
                "s3:DeleteObject",
                "s3:GetObject",
                "s3:PutObjectAcl",
                "s3:ListMultipartUploadParts",
                "s3:PutObject"
            ],
            "Resource": "arn:aws:s3:::YOUR-BUCKET/*"
        },
        {
            "Sid": "Stmt2",
            "Effect": "Allow",
            "Action": [
                "s3:GetBucketAcl",
                "s3:ListBucket",
                "s3:ListBucketMultipartUploads",
                "s3:GetBucketLocation",
                "s3:PutBucketAcl",
                "s3:GetBucketNotification",
                "s3:PutBucketNotification",
                "s3:GetBucketPolicy",
                "s3:PutBucketPolicy",
                "s3:DeleteBucketPolicy"
            ],
            "Resource": "arn:aws:s3:::YOUR-BUCKET"
        }
    ]
}
If you prefer using visual editor, select required set of permissions from each group:
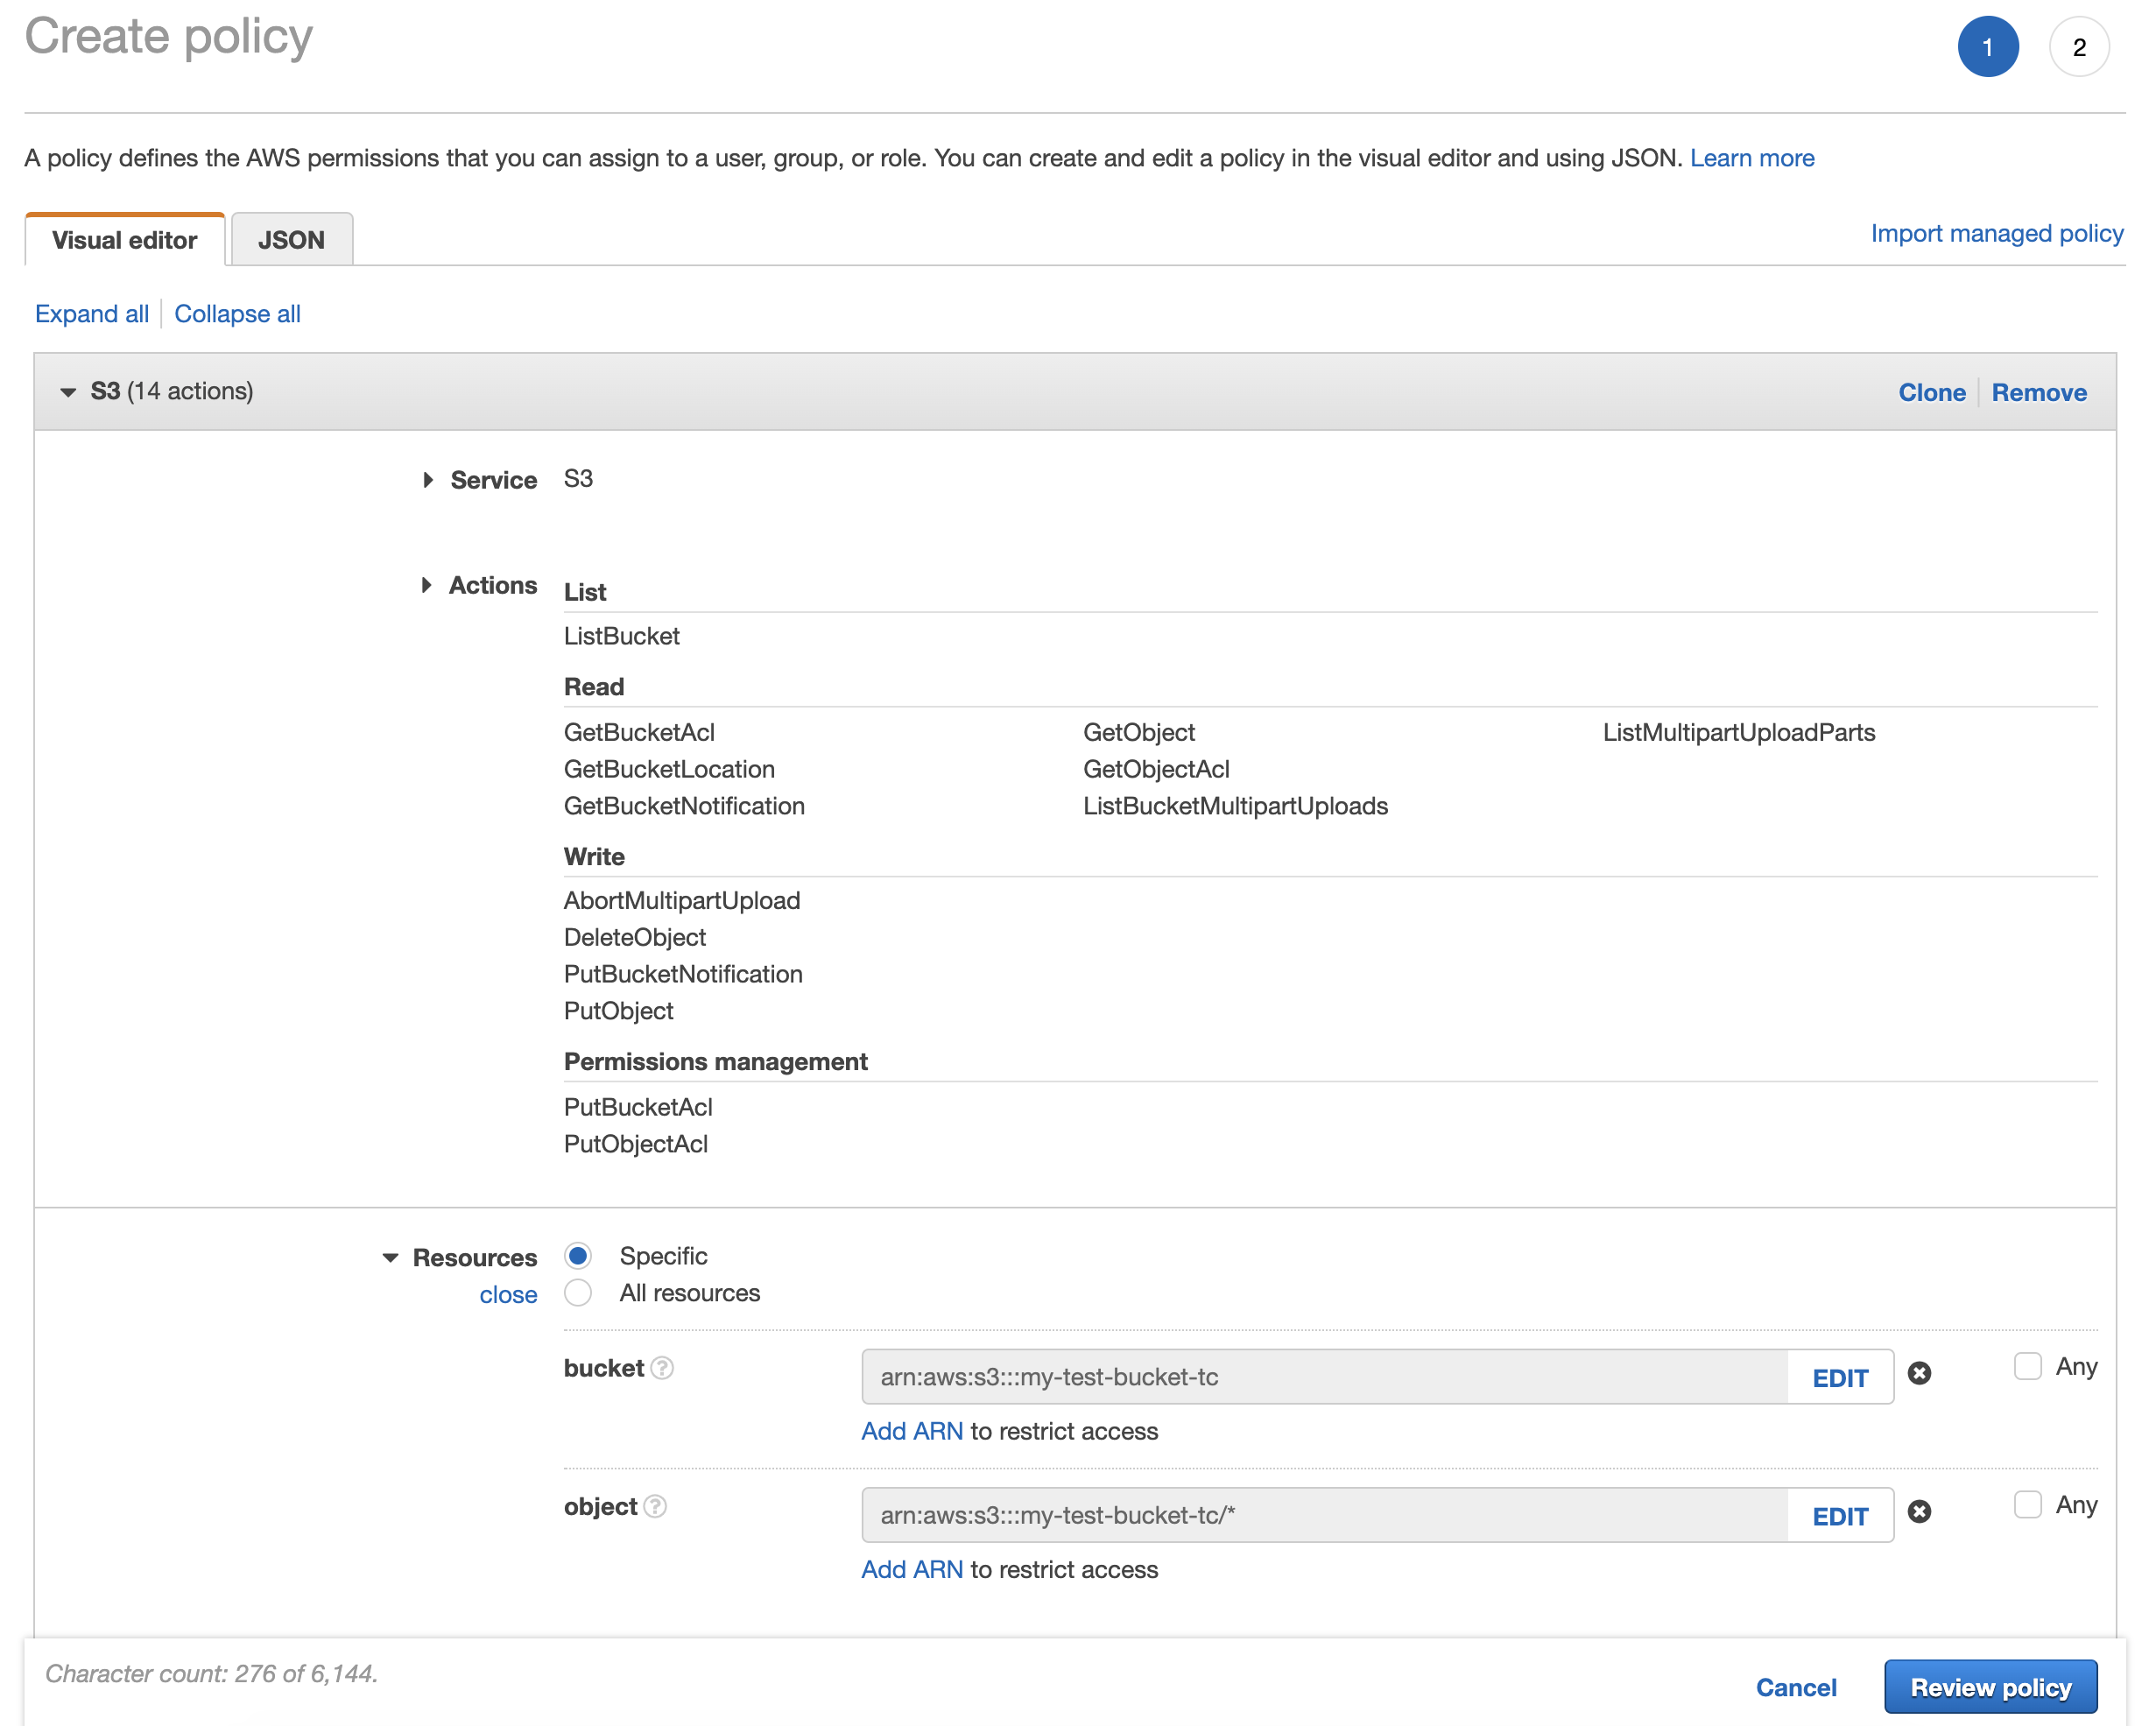
You also need to specify resources to which this policy applies. Click "Add ARN" and enter name of the bucket. Also, tick "Any" next to "Object name" field.
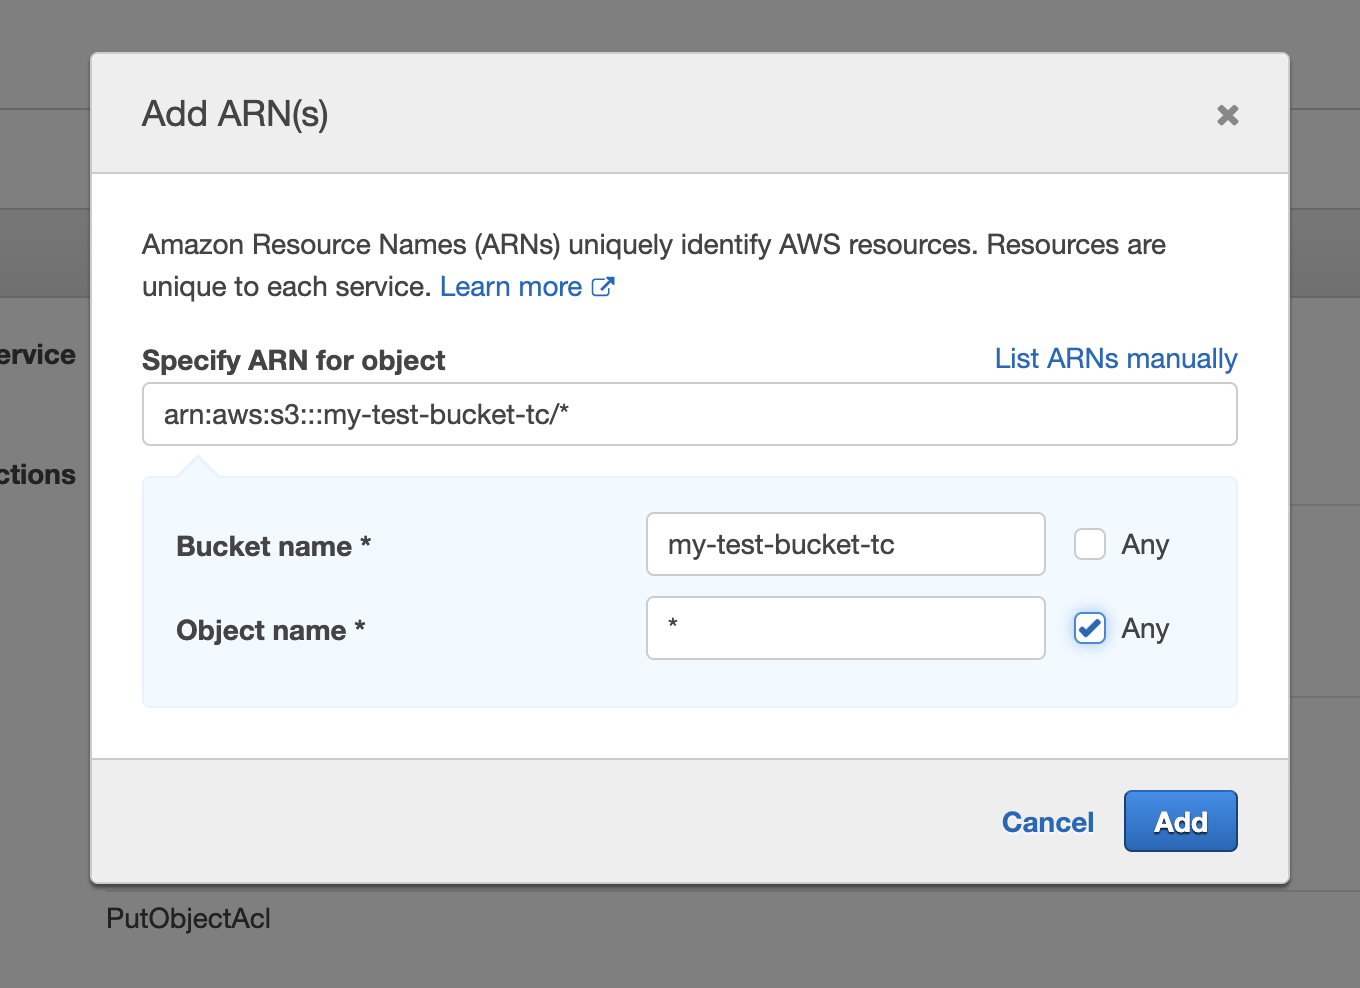
Once done, click "Review policy". This will take you to the last step where you can name your policy.
Now go back to the tab where you started creating IAM role and select your newly created policy to be applied to this bucket.
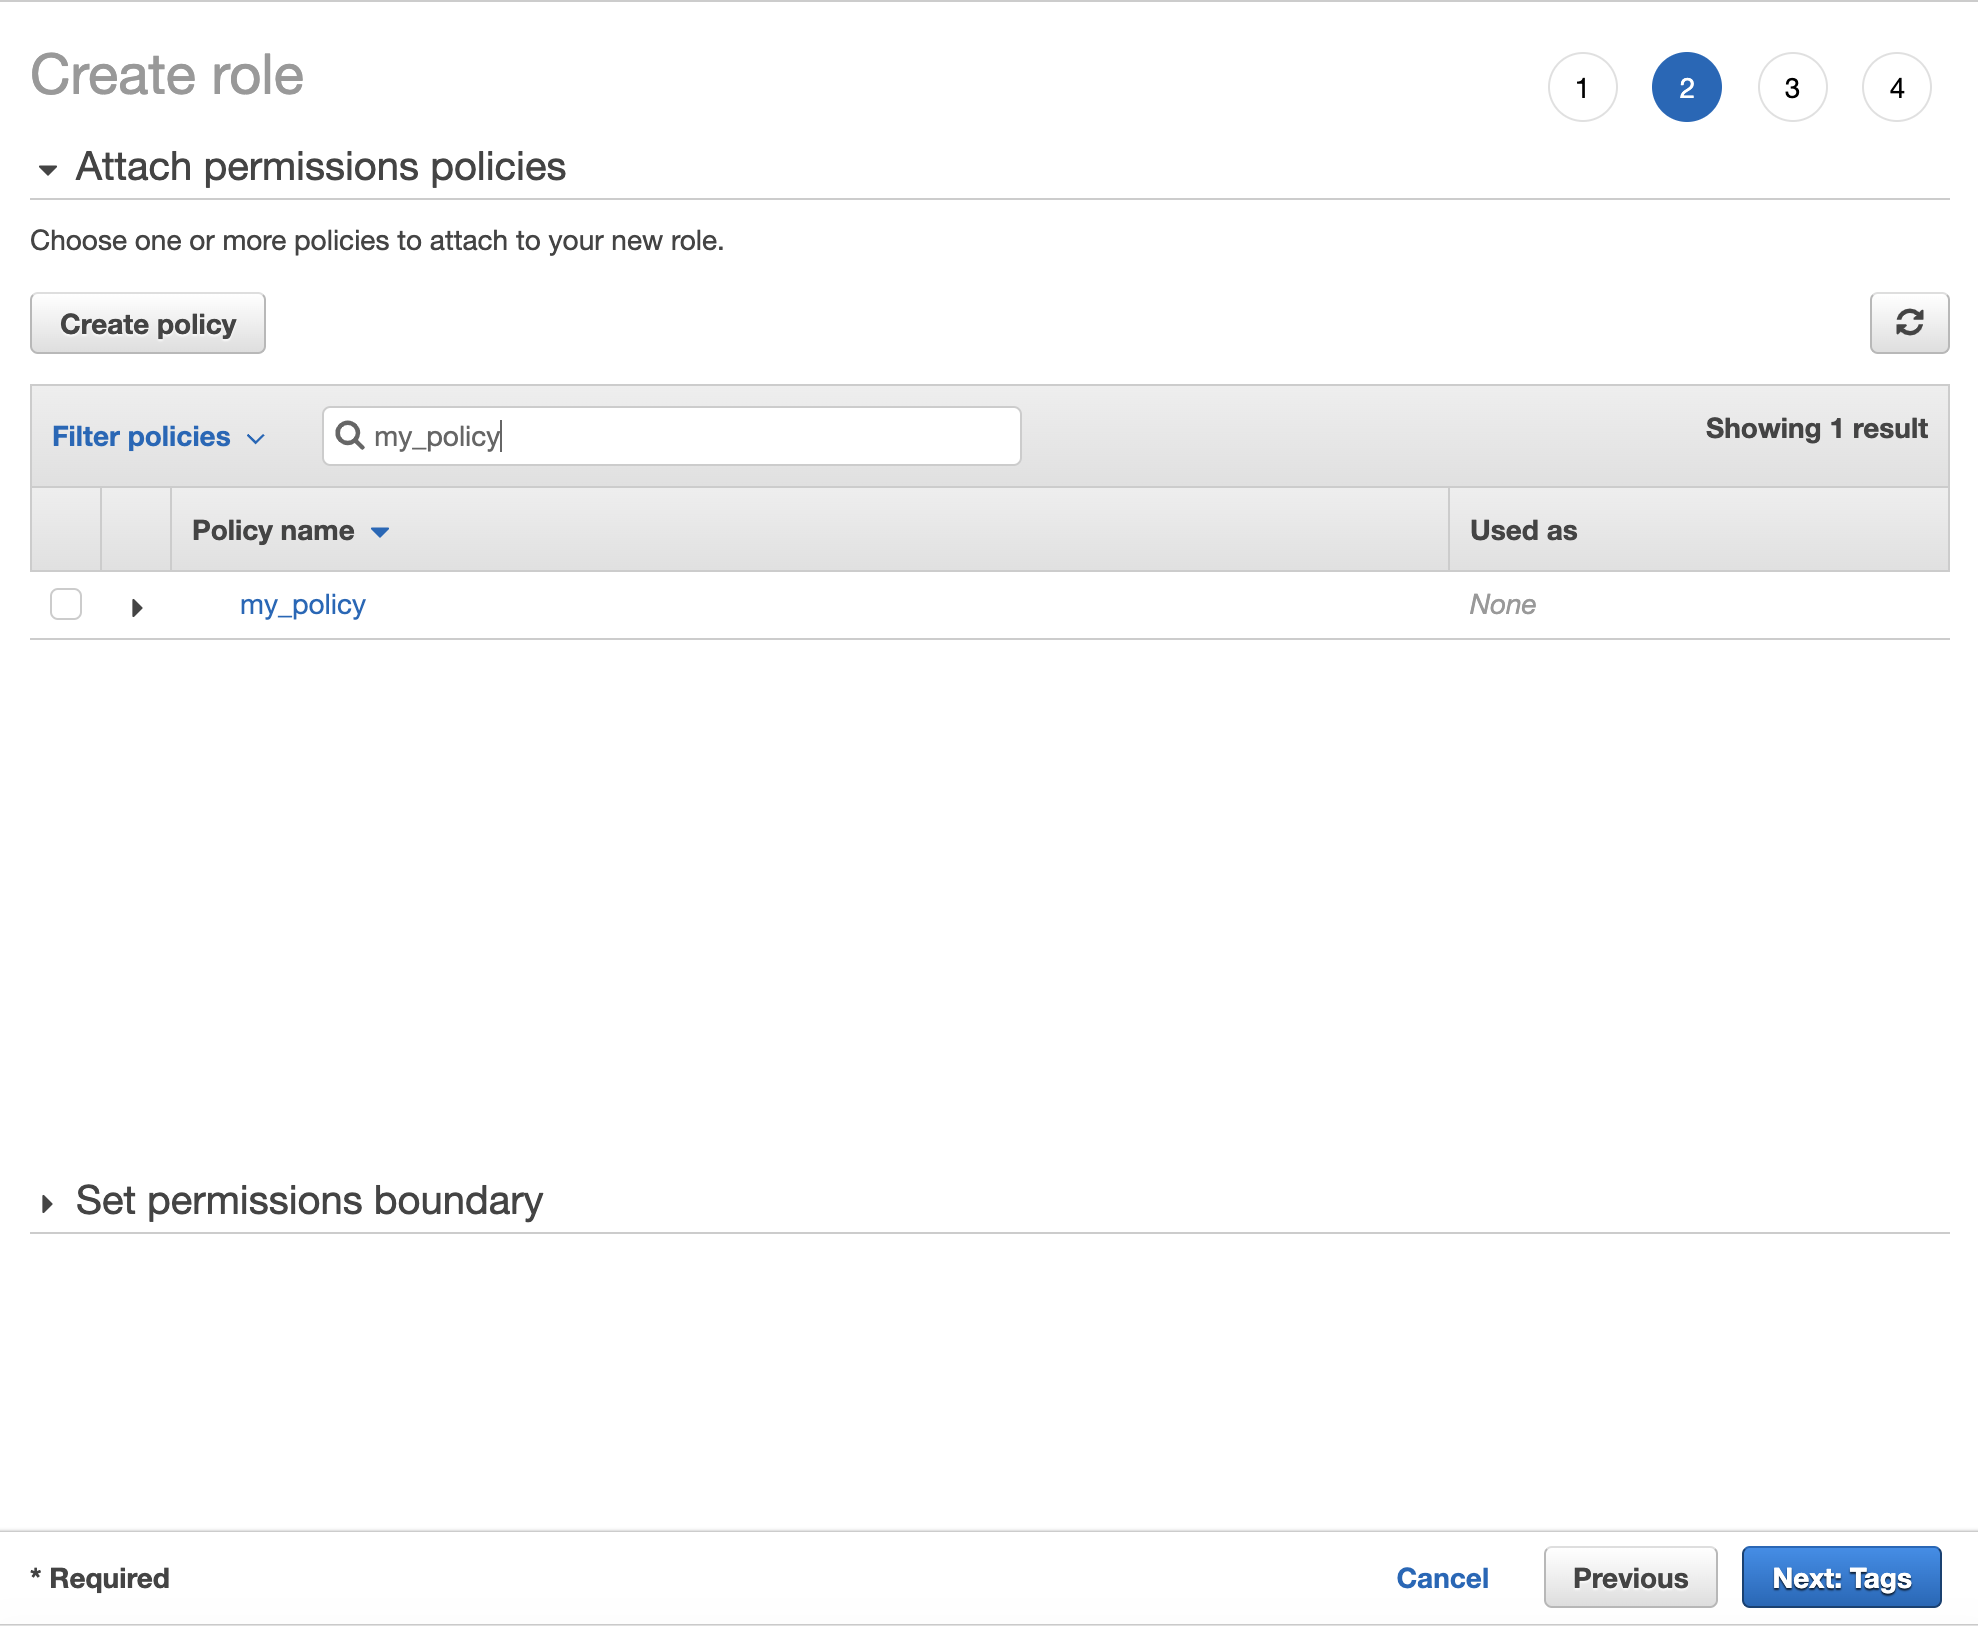
For now, you can ignore setting tags in the next step and just move on to Review, name your role and click "Create Role" to finish the process. You will be taken to the view with the list of all roles in your account. Find the role you just created and click it to view its details.

First item in the role summary is Role ARN, which is needed to setup your S3 store in Telestream Cloud. Copy it and log-in to your Telestream Cloud account.
Adding S3 store to your Telestream Cloud account.
Once logged in go to Stores Management and click "Add Store"

Select S3 as storage type, give it a name, paste the Role ARN and enter the name of the bucket you created to be a watch-folder.
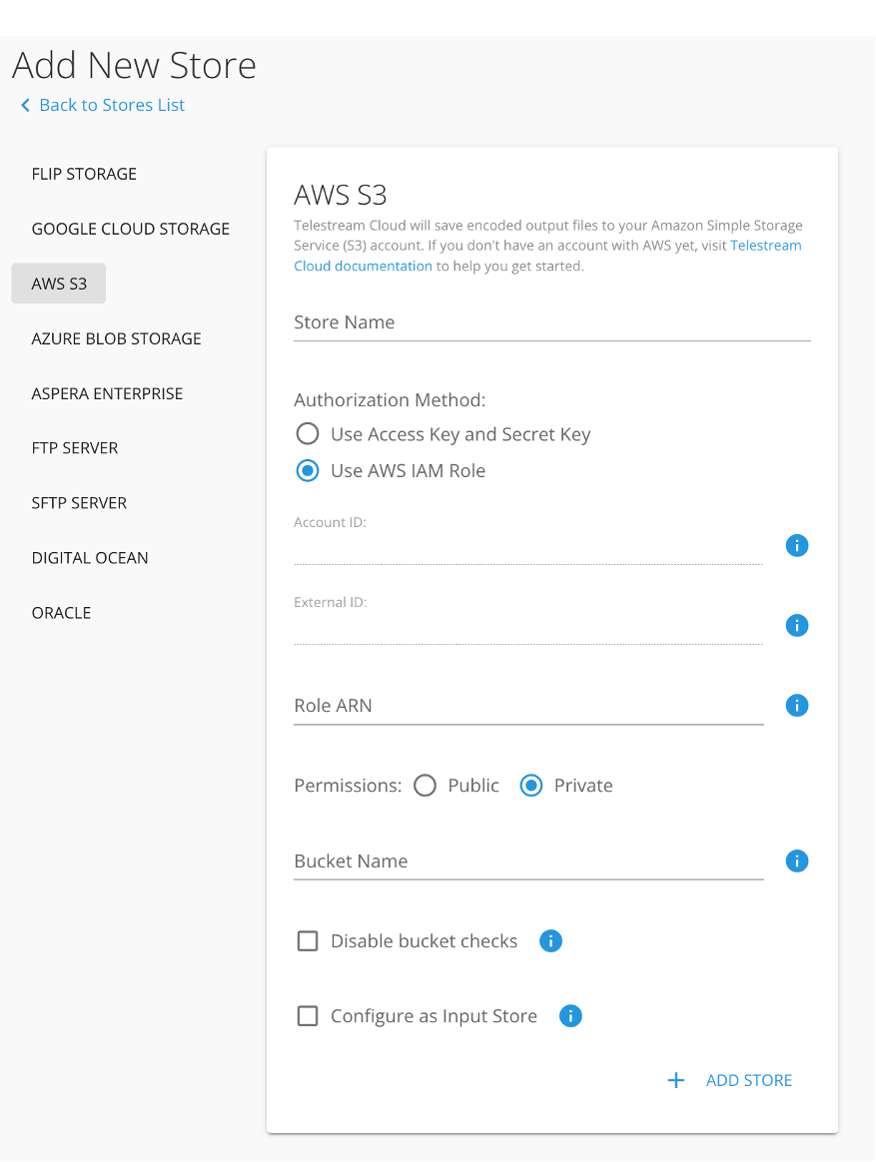
Click "Add store" to complete the process. You can now proceed to setting watch rules.
Configure Watch Rules
Watch rules in general define which Factory or Project in any Telestream Cloud will use the watch-folder as source and allow you to control what types of files are going to be processed. To define a watch rule click "+" button in the Watch Rules column on the list of stores.

This will take you to the Add Watch Rule config view. Pick the service and a Factory/Project that should use this watch-folder and optionally define a path pattern. If you leave it blank, any file that arrives at this watch-folder will trigger a job.
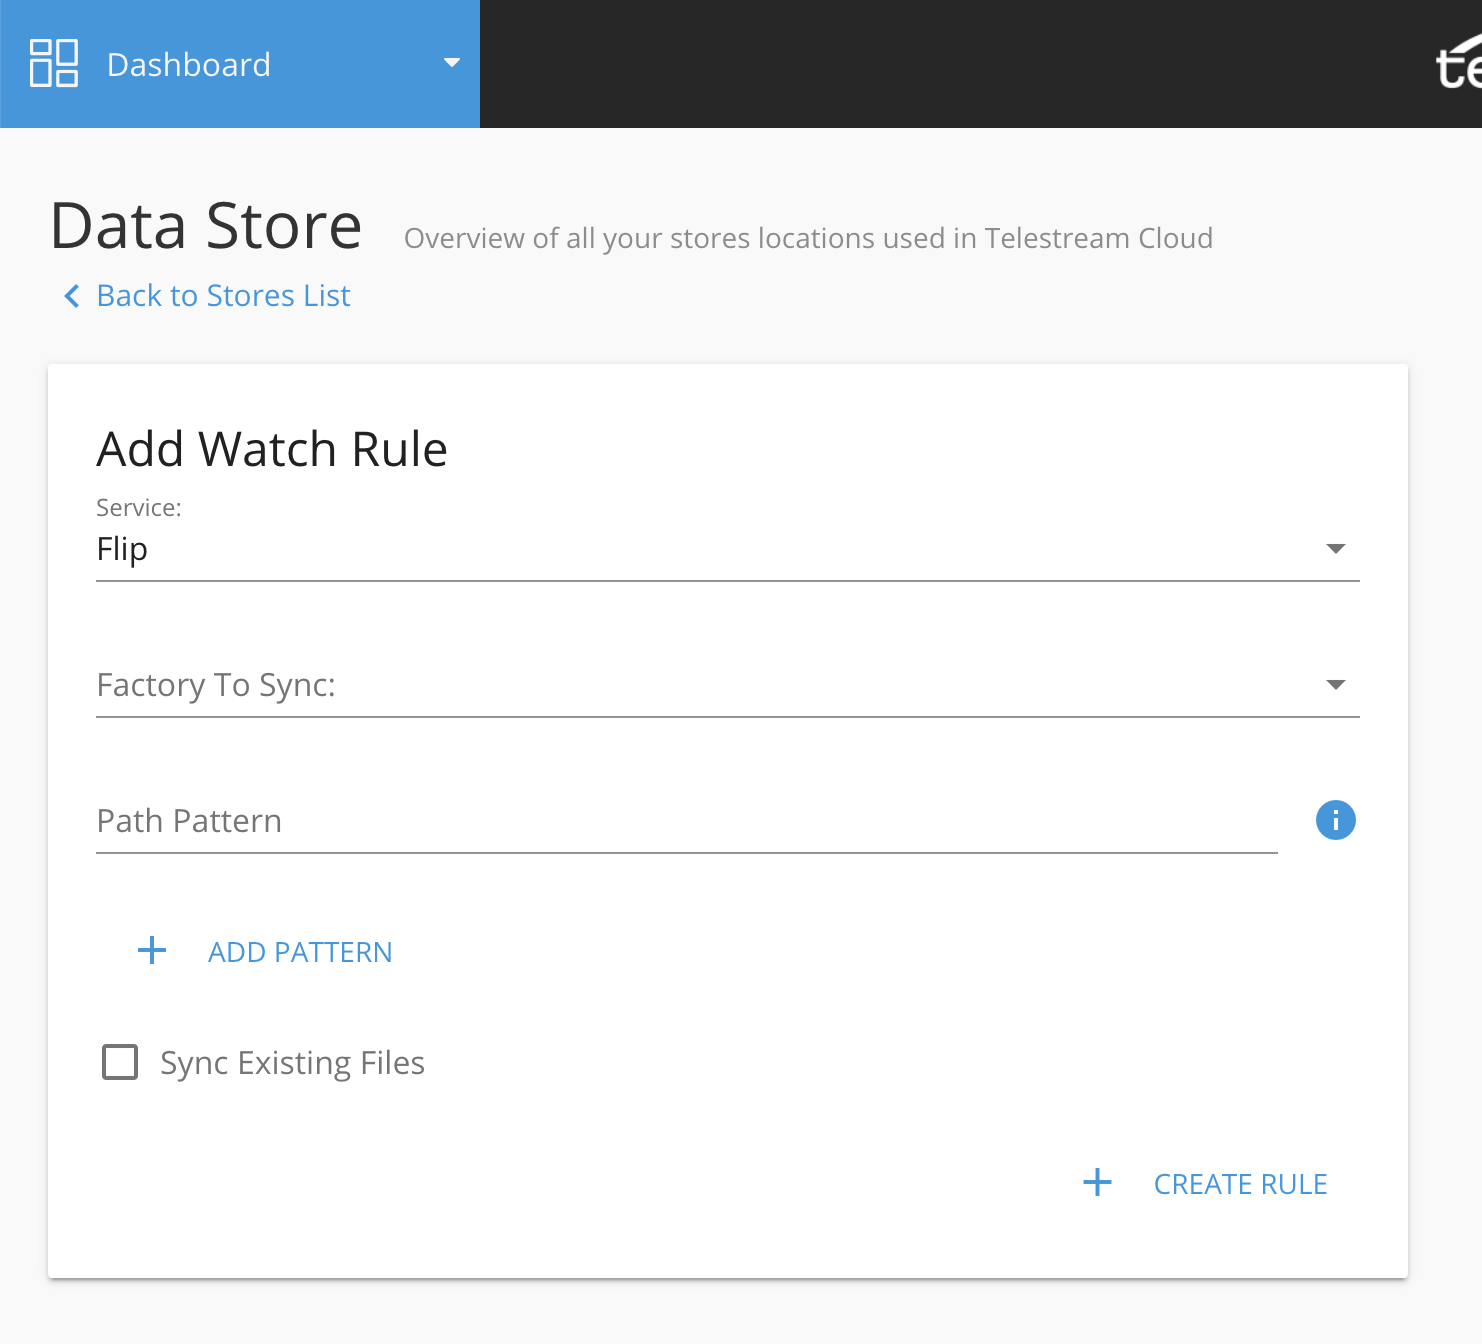
However, if you need more control over what files be processed you can use regular expressions to match specified file types or folders within bucket:
- match only files of certain type to be processed:
*.(mxf|mp4) will match any file with mxf or mp4 extension - match certain file types in specific folders within the bucket:
folder/${dir1}/${dir2}/.mp4* - match video and captions files from different folders:
folder/${dir1}/${dir2}/${name}.mp4
folder/${dir2}/${dir1}/${name}.scc
You can create multiple patterns for each watch rule.
If you have exiting files already in the watch-folder and you'd like to process them, check "Sync Existing Files". Be careful though, as this will automatically trigger jobs. If you have large amount of files to process this can be time consuming.
Click "Create Rule" to add it to your watch-folder. All you need to do now is to upload first source file to your AWS S3 watch-folder bucket.
Updated over 3 years ago
