Amazon SNS Notifications
Setting up Amazon SNS notifications in Telestream Cloud web console
Amazon Simple Notification Service (Amazon SNS) is a web service that coordinates and manages the delivery or sending of messages to subscribing endpoints.
Setting up SNS notifications requires following steps:
- Create a new notification in Telestream Cloud
- Create a SNS Topic (in your AWS account)
- Create a Subscription to the topic (in your AWS account)
- Create IAM Policy and IAM Role to securely grant Telestream Cloud rights to publish message to the topic (in your AWS account)
Start creating a notification in Telestream Cloud web console
Log-in to your Telestream Cloud account and in the top right menu click "Notifications". Then click "Add Notification" to start creating new notification.

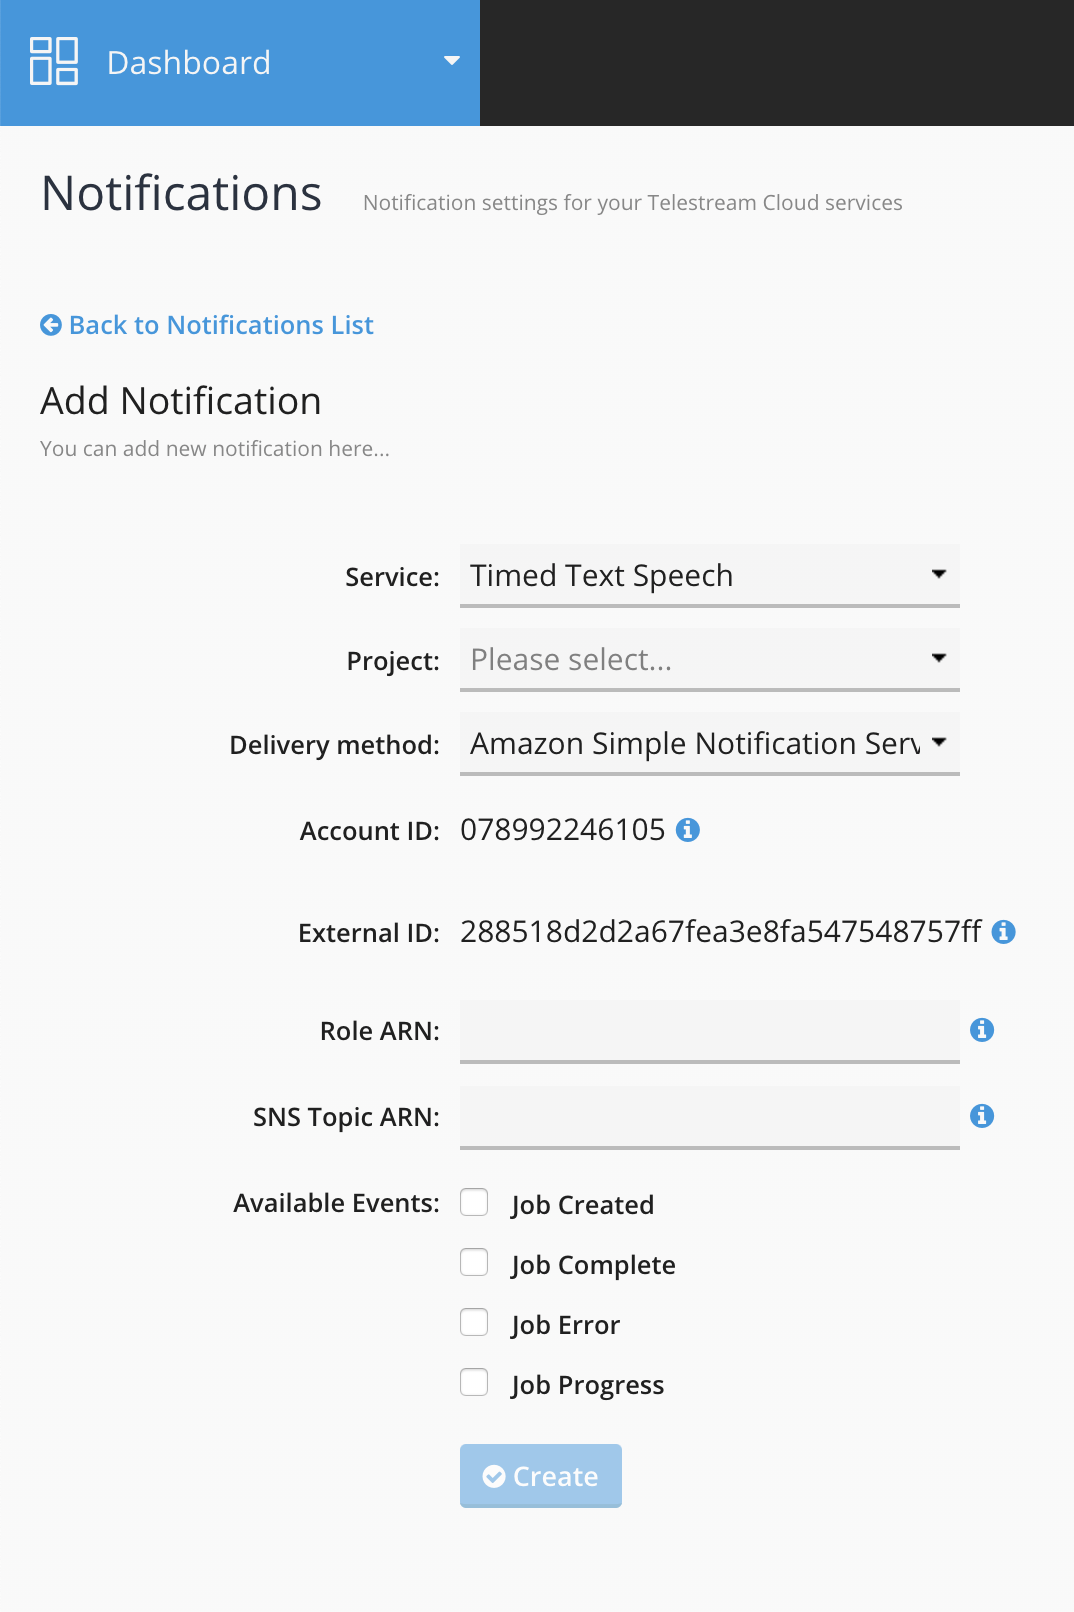
Select a service and Factory or Project for which you need to enable the notifications. Then as a delivery method select "Amazon Simple Notification Service". Account ID and External ID will be required in the next steps when we move on to creating topic, subscription and IAM role in AWS web console. IAM role is required to securely grant us rights to publish messages to your topic.
Create SNS topic in AWS web console
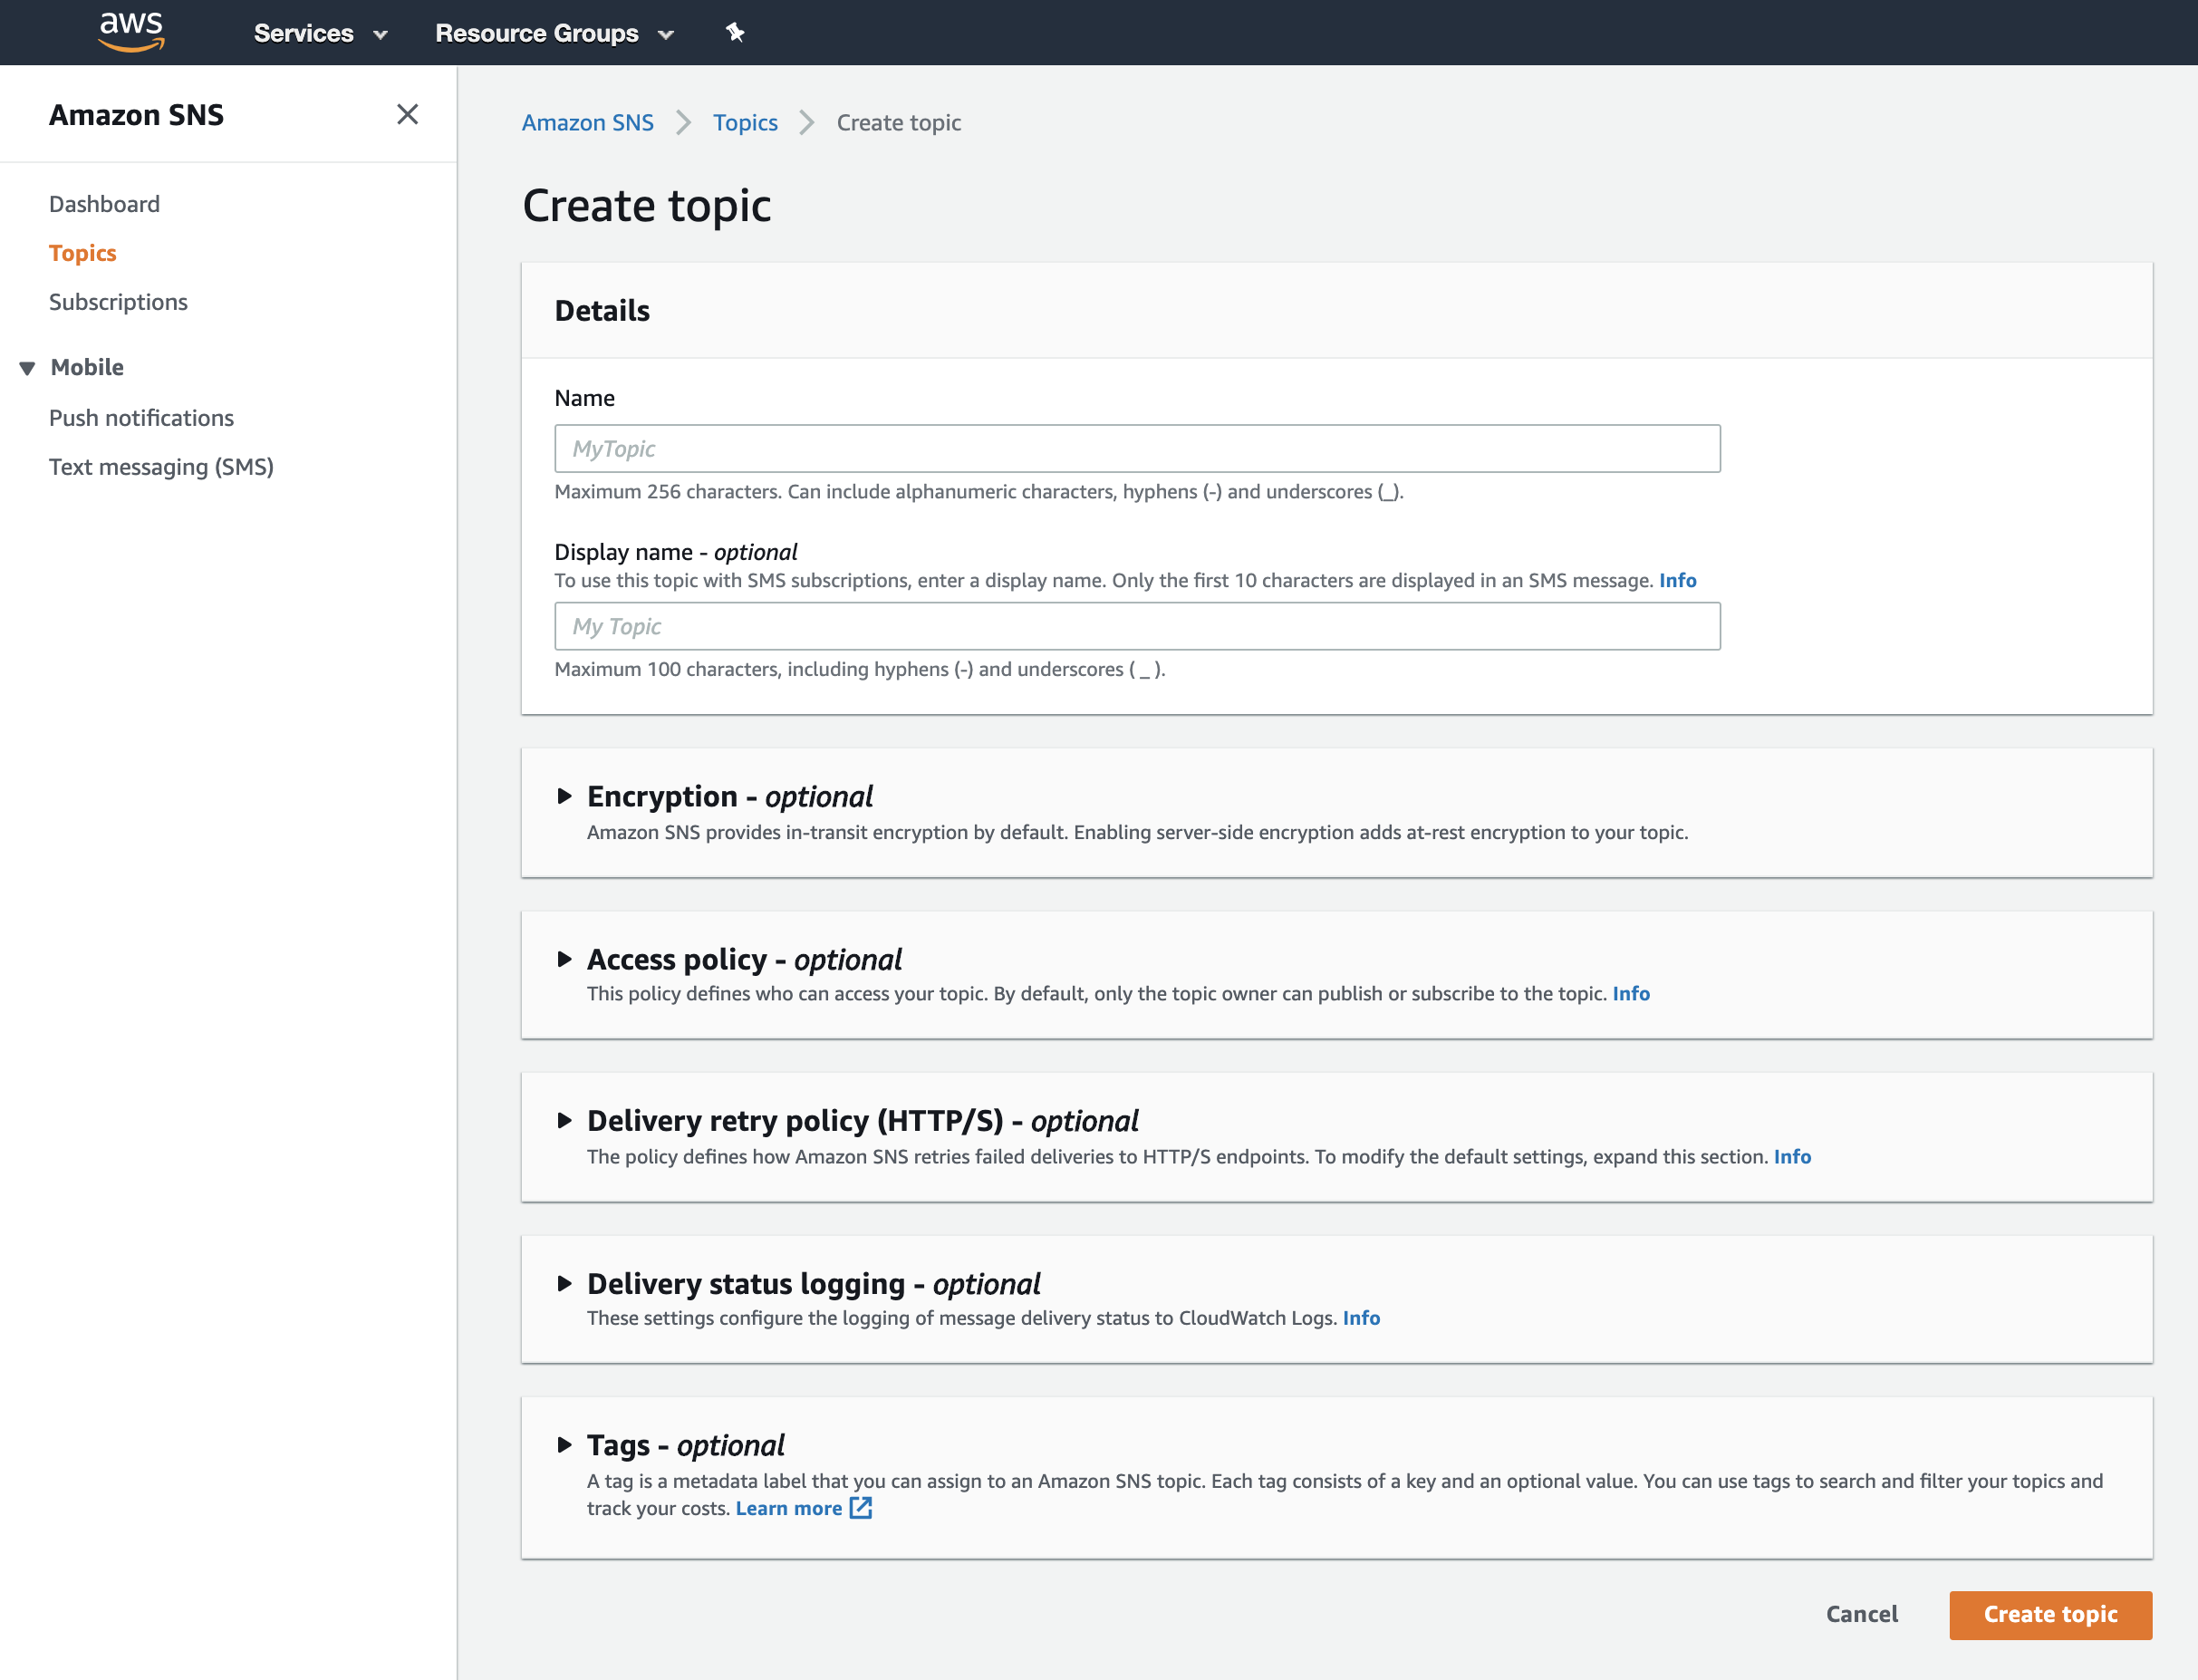
Open a new tab in your favorite browser and log in to your AWS account. Go to Simple Notification Service and from the left menu select "Topics". Click "Create topic". In the most basic scenario all you need to configure is topic name
Check your IAM user permissions
Important: IAM user on your account must have access to SNS and IAM services, as well as permissions to create SNS Topic, SNS Subscription, IAM Roles and IAM Policy.
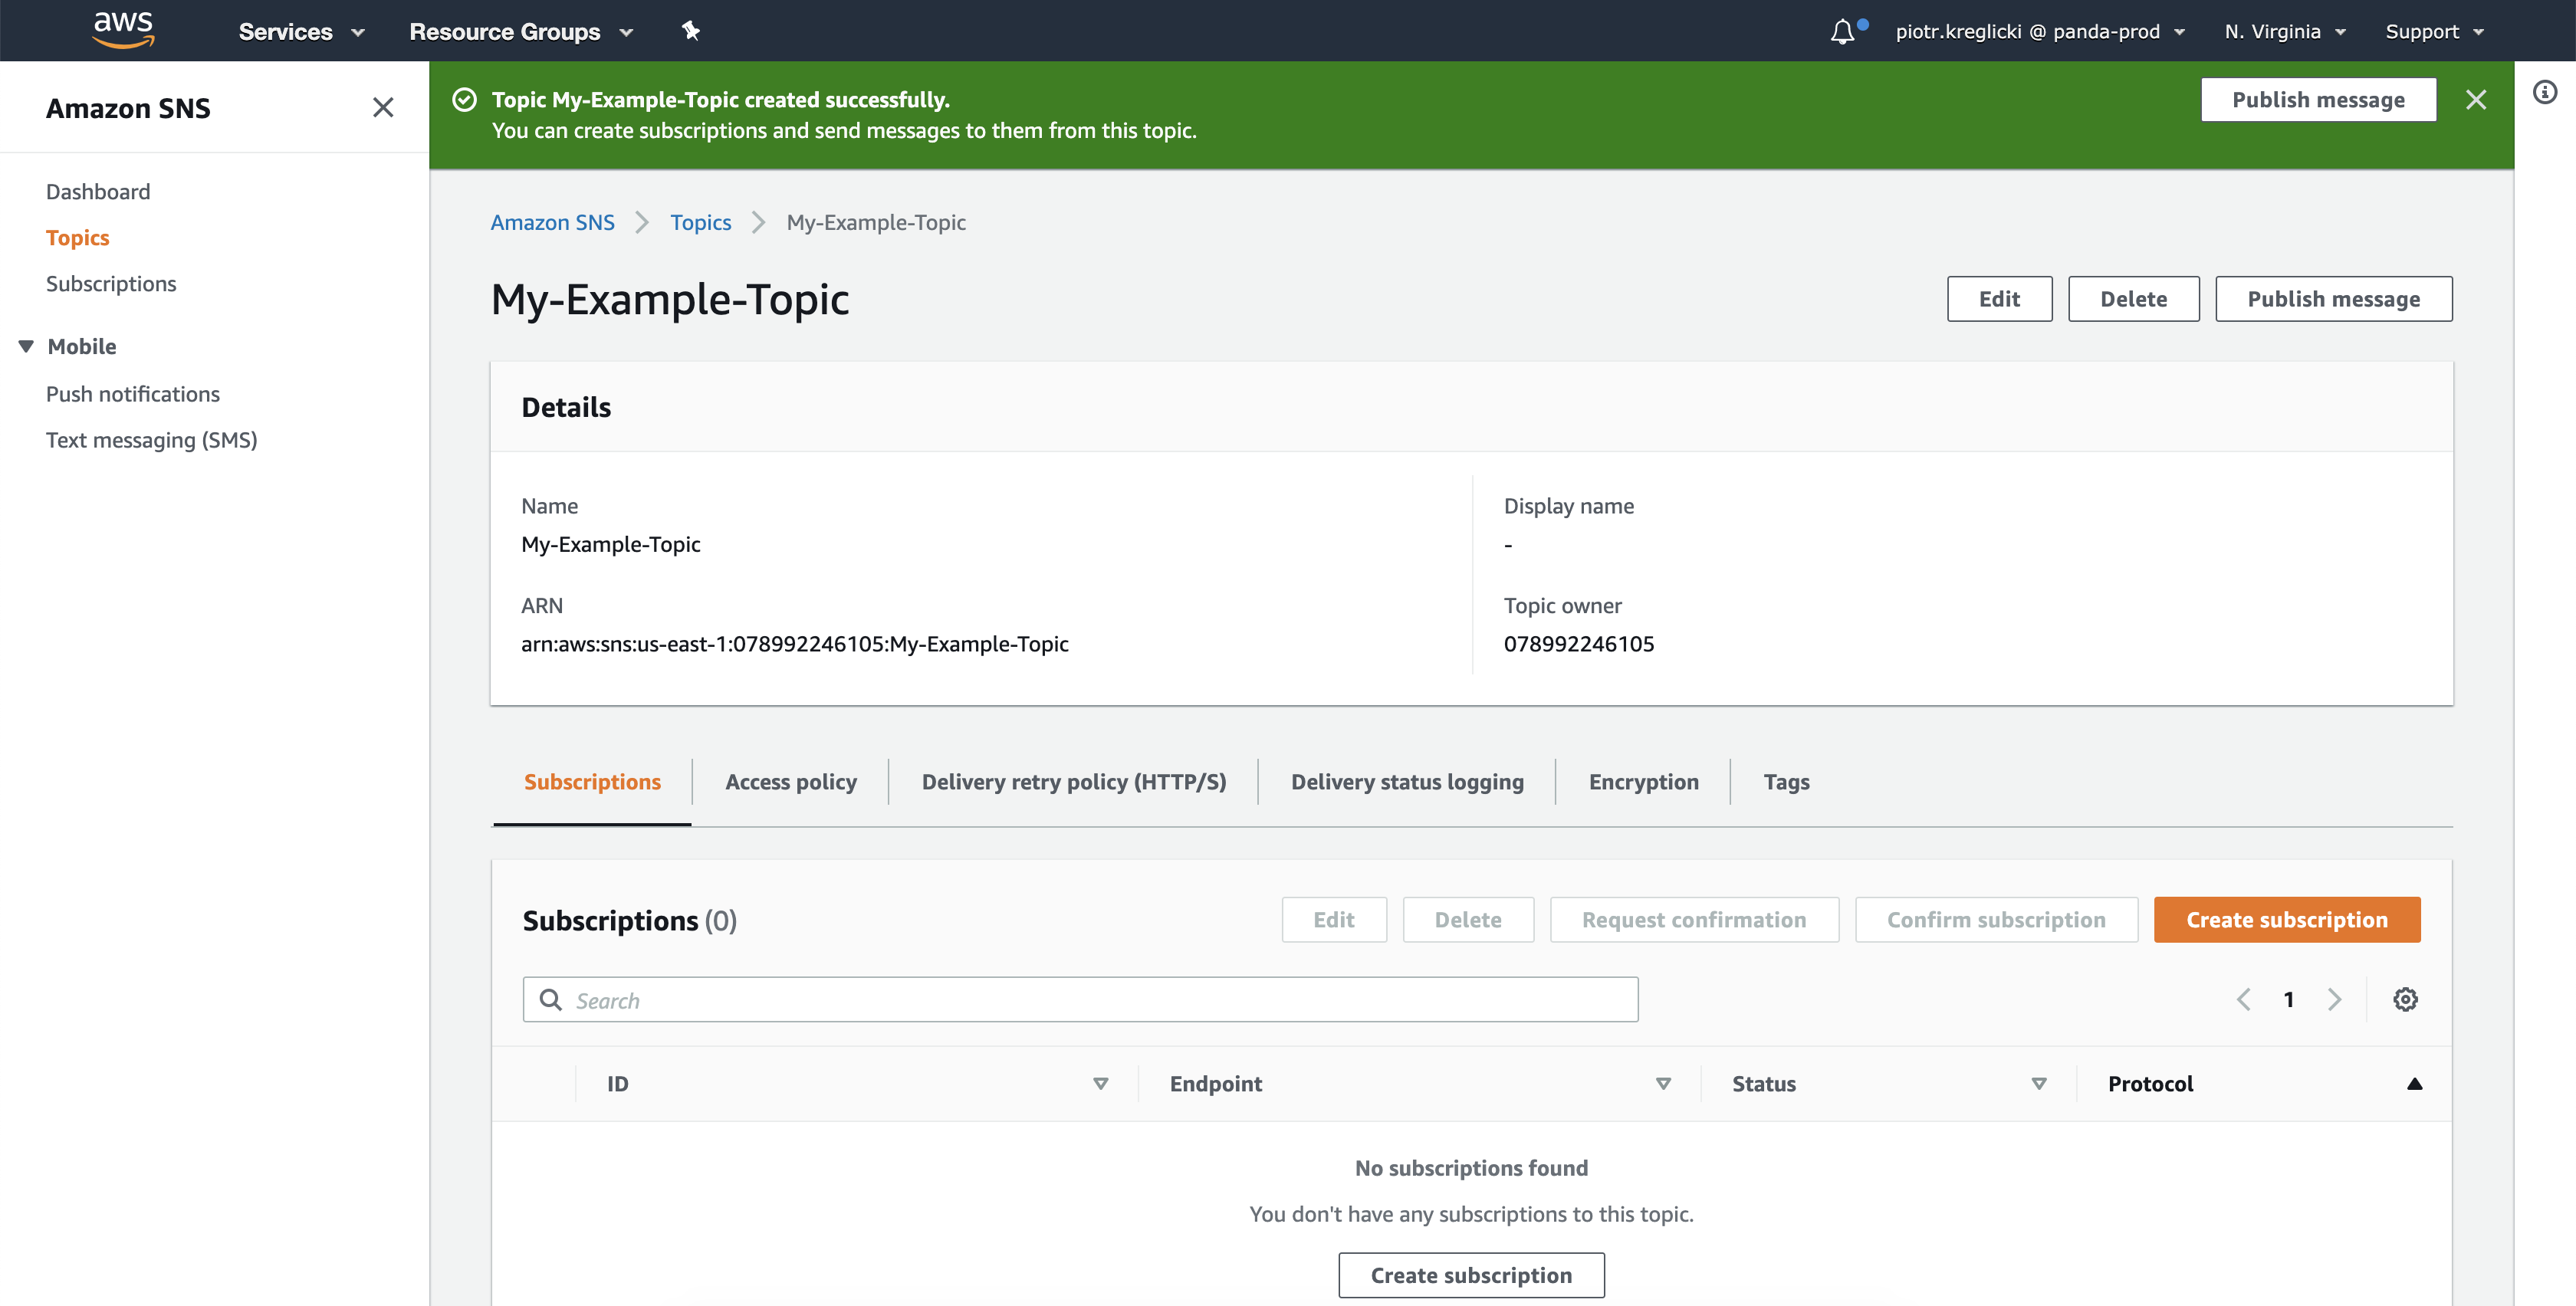
Click "Create topic" to finish. You will get a confirmation message and see details of your newly created topic. For now, the one piece of information that is important is your topic ARN. You will need to provide it in our web console to complete adding SNS notifications.
Create subscription in AWS web console
Now it's time to add a subscription to the topic so you can receive notifications from Telestream Cloud. Click "Create subscription", select protocol and specify endpoint to receive the notifications. Depending on the protocol the endpoint can be one of the following:
- a web server URL
- ARN of an AWS service (SQS or Lambda)
- an e-mail address
- a phone number (for SMS messages)
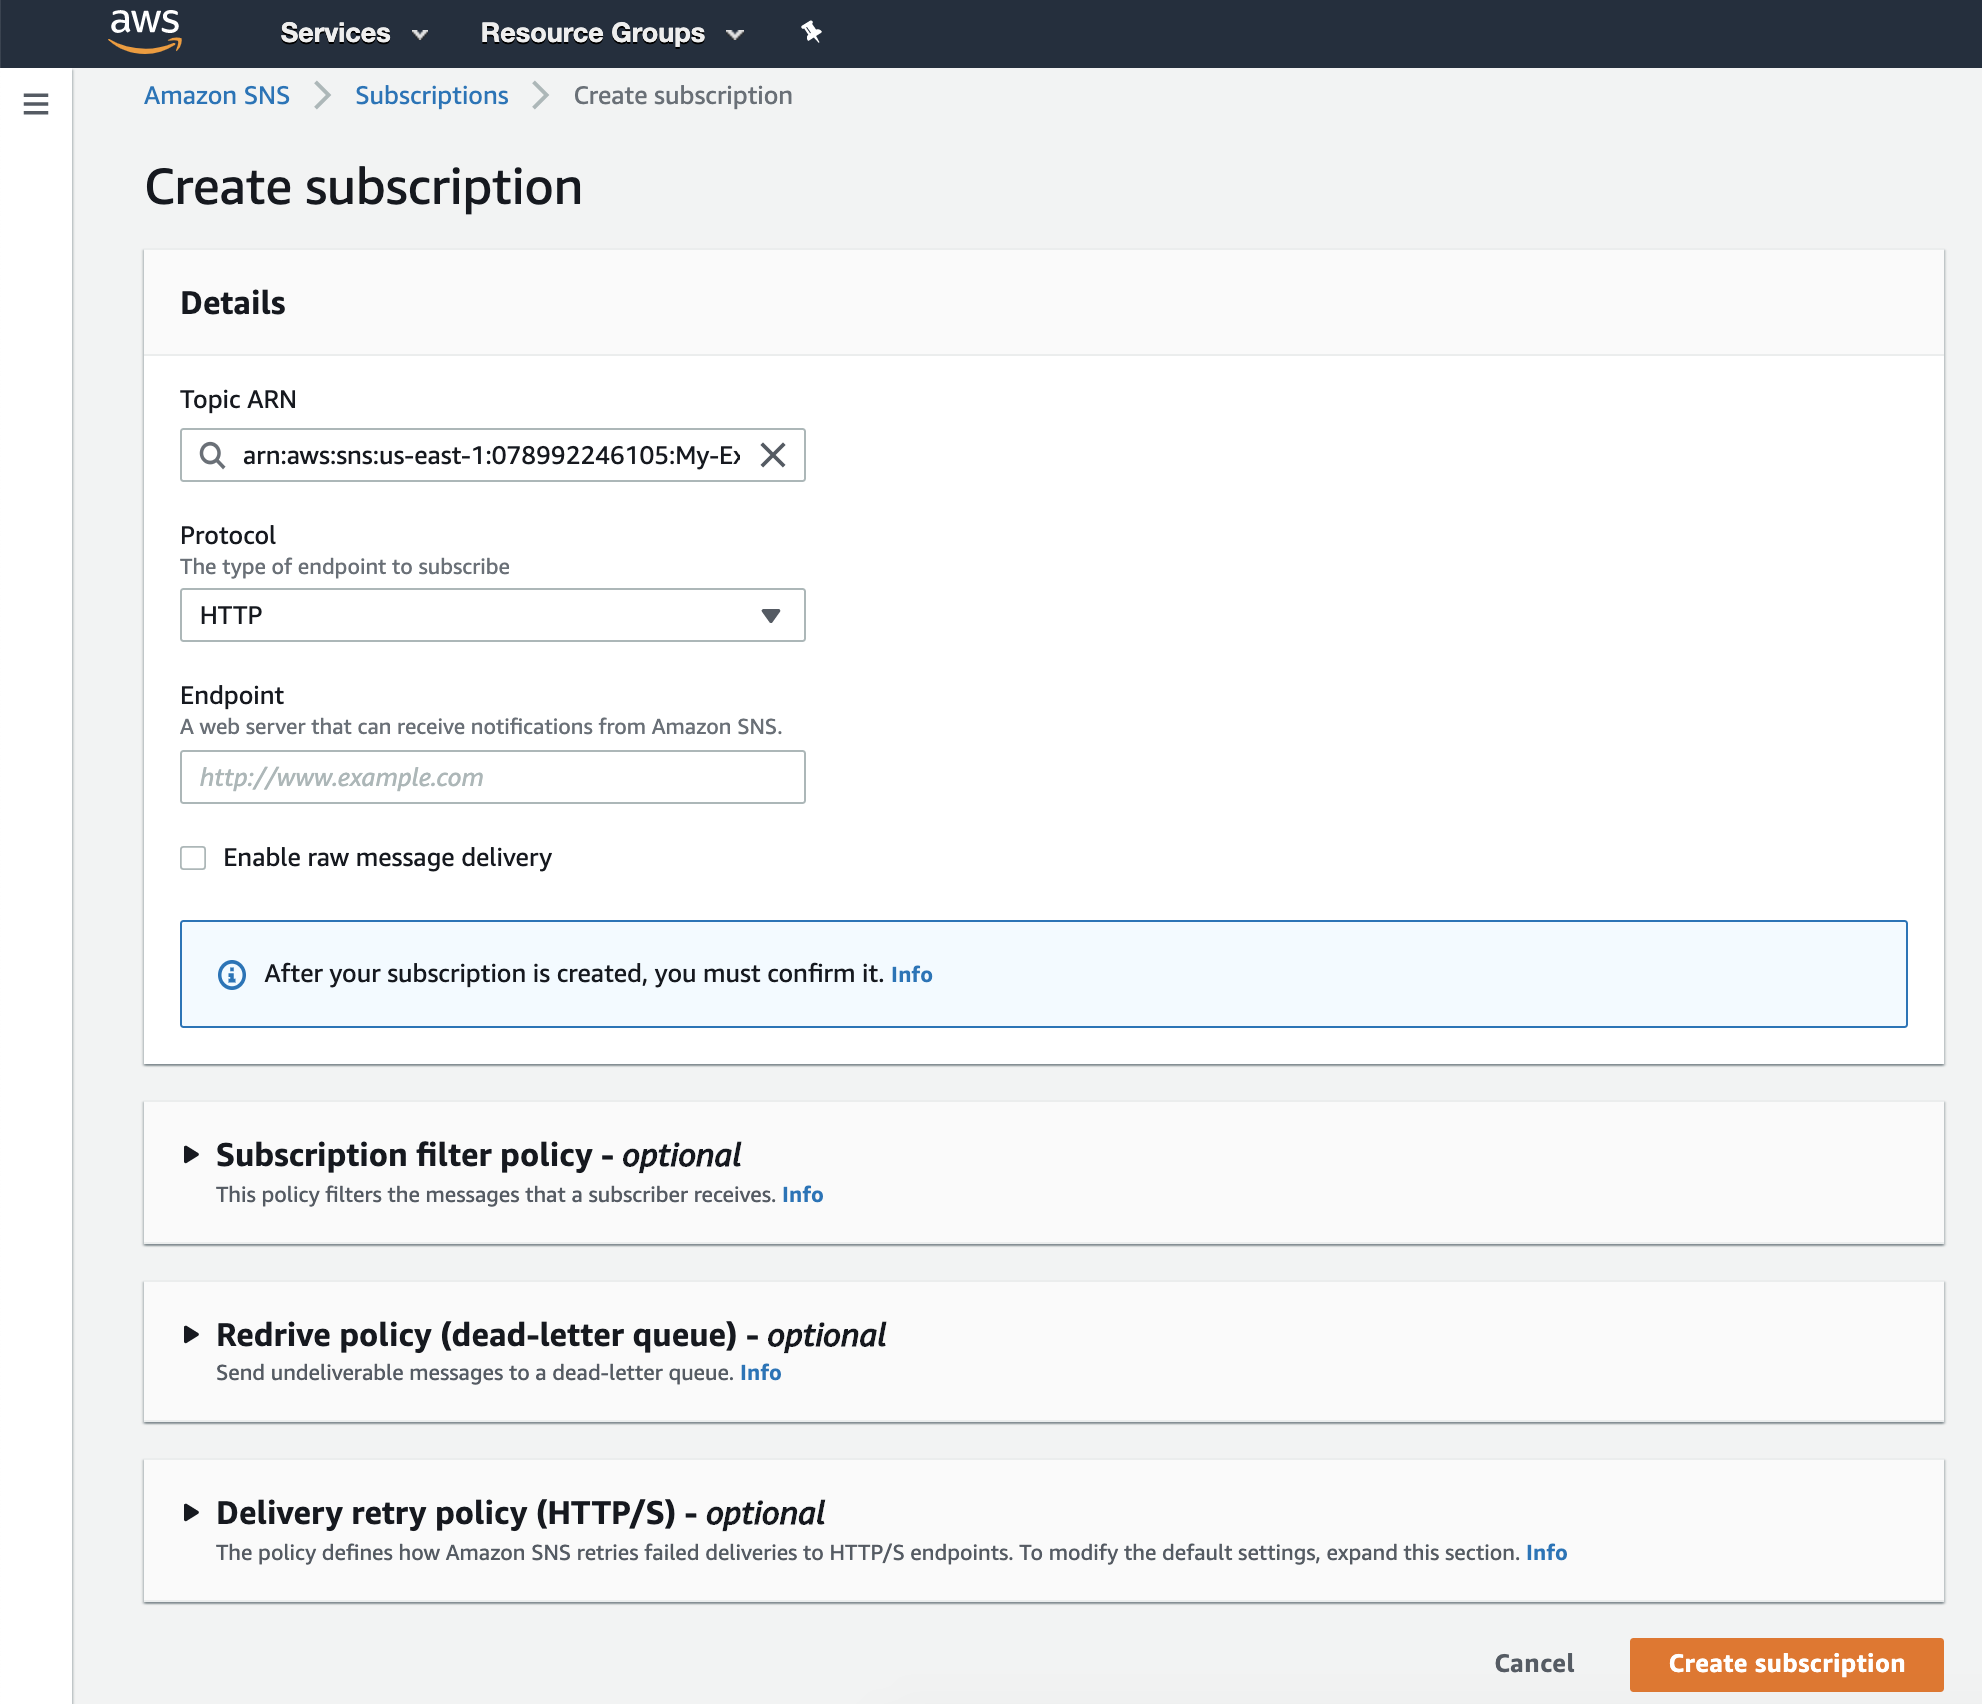
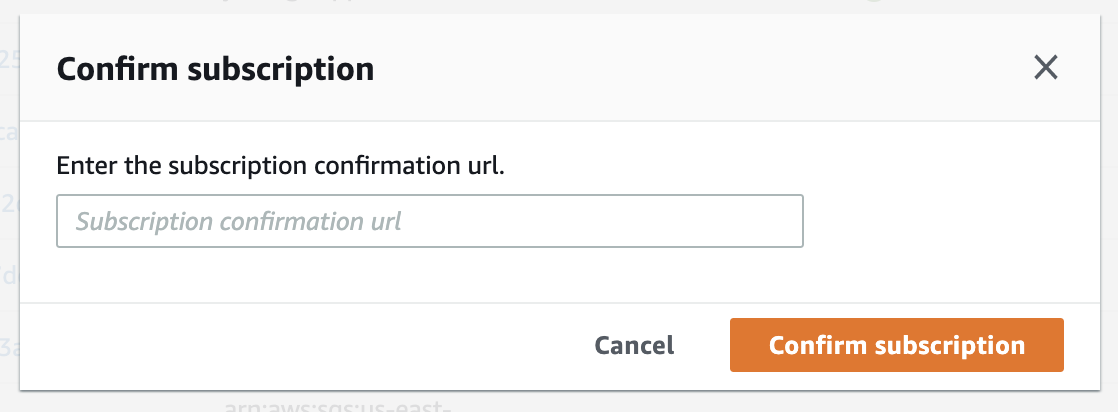
Click "Create subscription" to finish and confirm your subscription. In the subscriptions list select the one you just created and click "Confirm subscription".

Confirmation process is very simple. Depending on the chosen protocol and endpoint you will receive a message that contains confirmation URL. You will need to paste it in the pop-up dialog. Status of the subscription will change to Confirmed.
Create IAM policy
For security reasons we strongly recommend using a dedicated IAM Policy and IAM Role that has just enough privileges to publish to selected topic.
To create IAM Policy go to go to Security, Identity & Compliance > IAM > Policies and click "Create policy".
Important: make sure that IAM user that creates the policy has sufficient privileges to grant required rights. While AWS will allow you to create the policy anyway, it doesn't mean we will be able to publish to your topic.
Here's an example JSON with policy that contains required minimum rights. You can simply copy and paste it. Remember to replace both REGION and SNS_TOPIC_ARN with valid values. Use the Topic ARN created previously.
{
    "Version": "2012-10-17",
    "Statement": [
        {
            "Sid": "VisualEditor0",
            "Effect": "Allow",
            "Action": "sns:Publish",
            "Resource": "arn:aws:sns:[REGION]::[SNS_TOPIC_ARN]"
        }
    ]
}
Click "Review policy" then name it and click "Create policy" to finish the process.
Create IAM Role
Now let's create an IAM Role which will use this policy to publish to the topic. Go to go to Security, Identity & Compliance > IAM > Roles and click "Create Role". Select "Another AWS account" as Trusted Entity type.
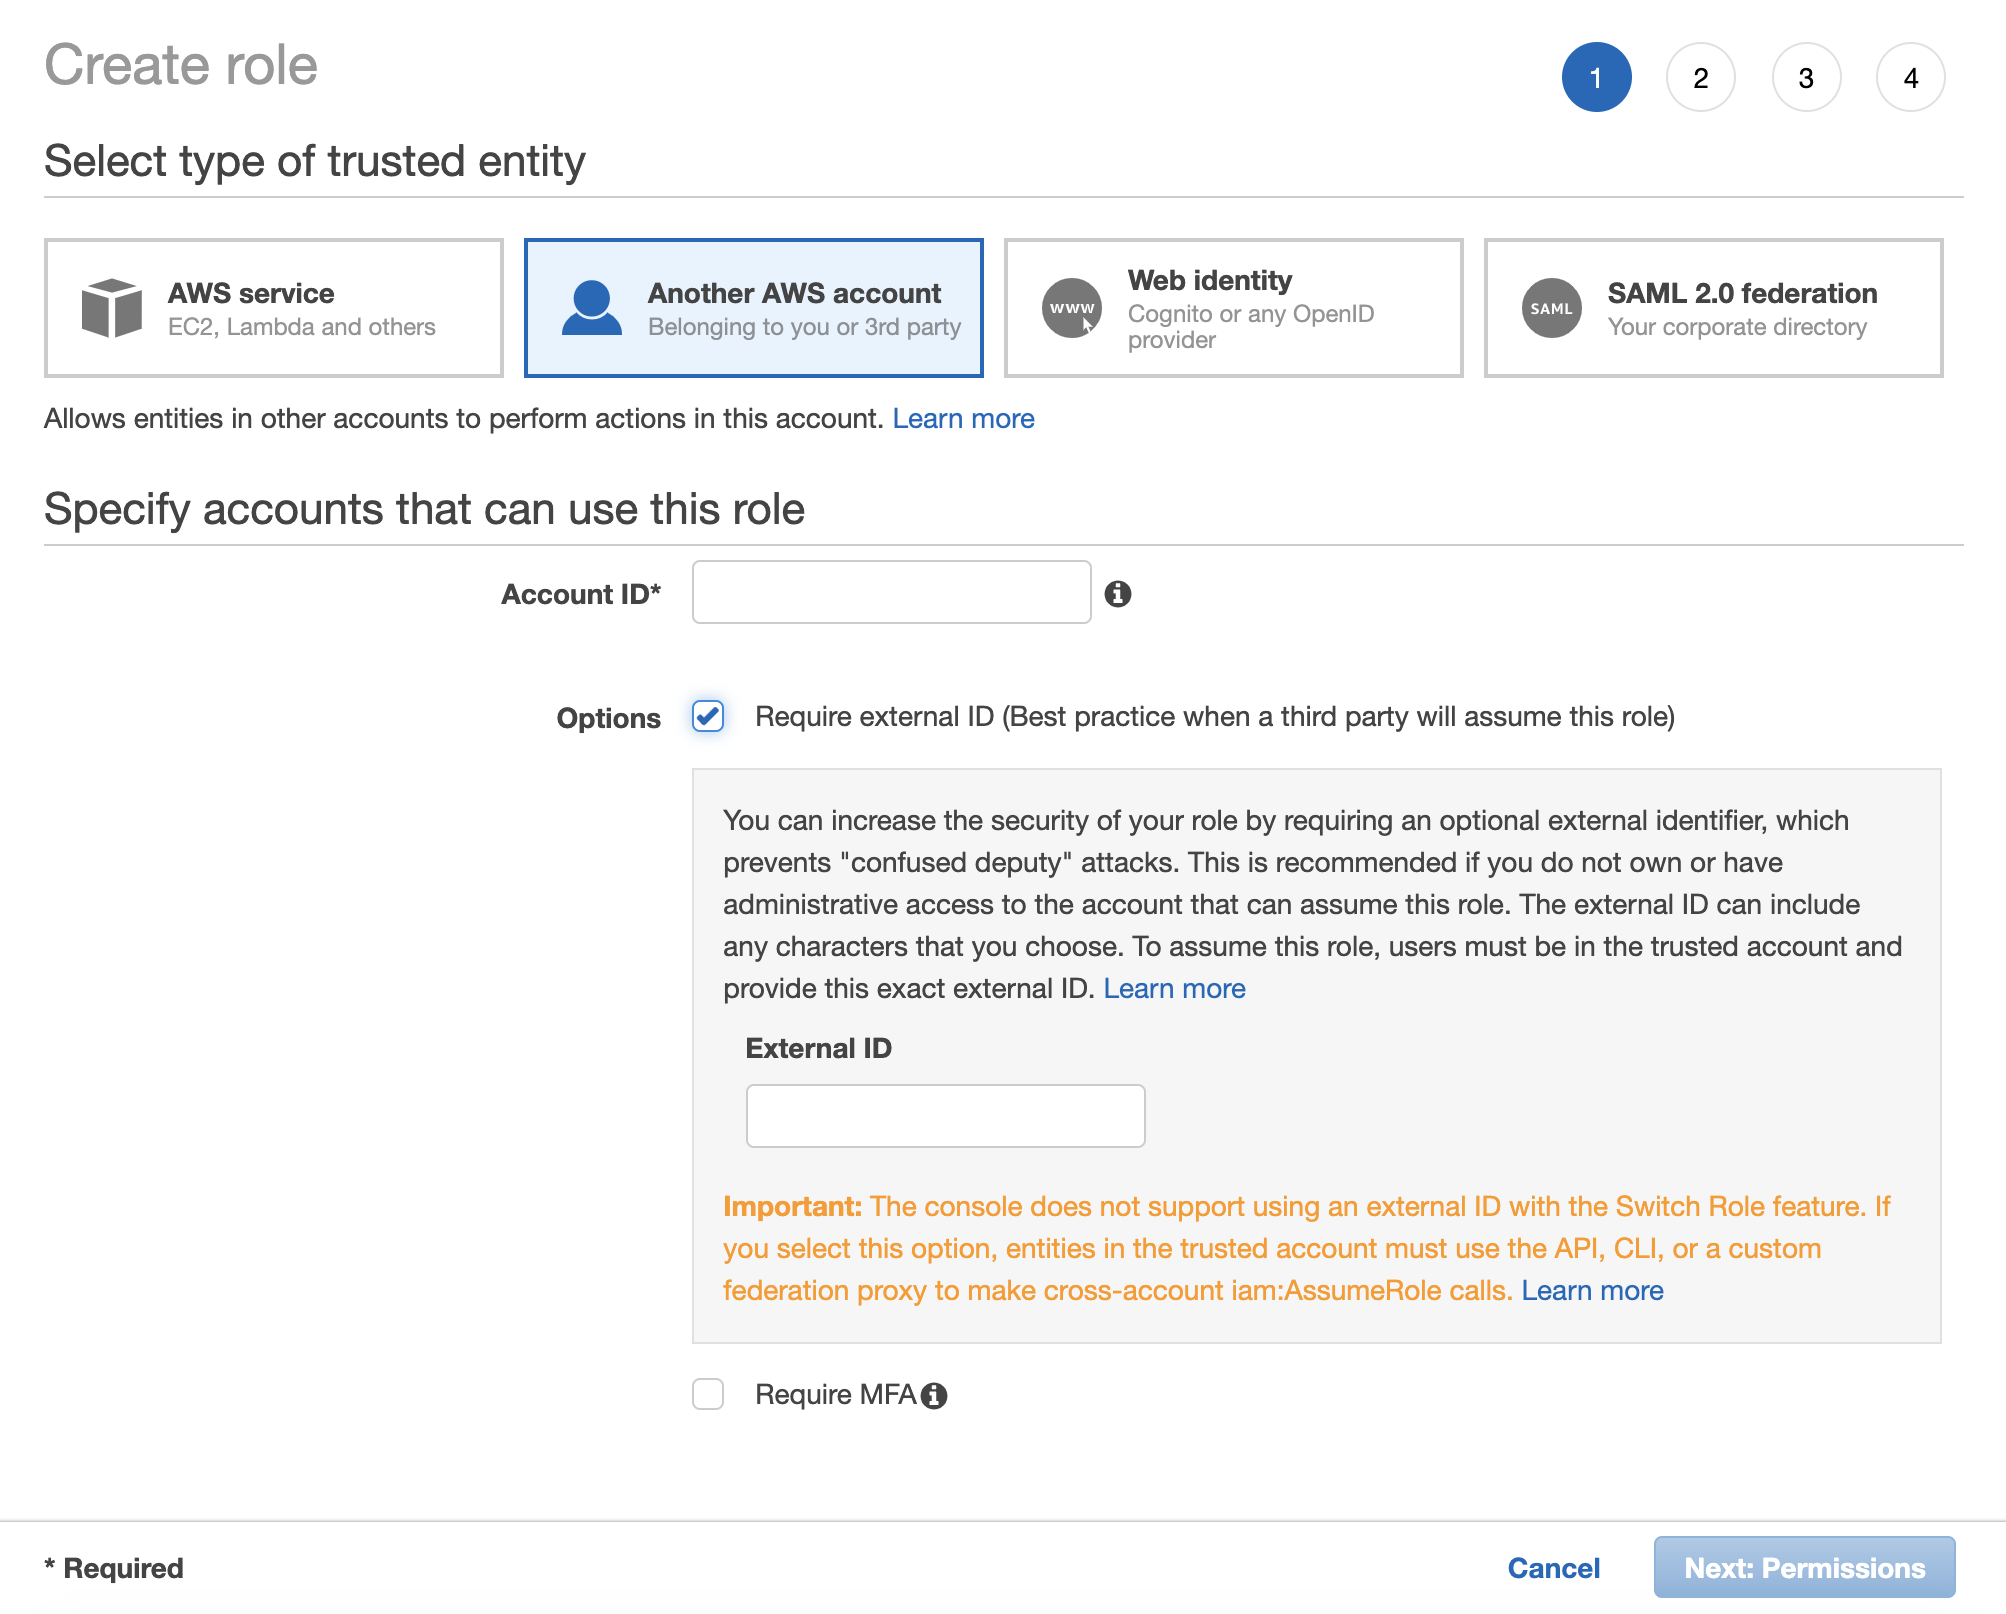
Account ID identifies service that is allowed to use this role, in this case Telestream Cloud. We also require an External ID as additional security measure. To allow us perform actions on your account use following:
- Account ID: 078992246105
- External ID: 288518d2d2a67fea3e8fa547548757ff
Click "Next: Permissions" to go to defining permissions and from the list select the policy you just created.
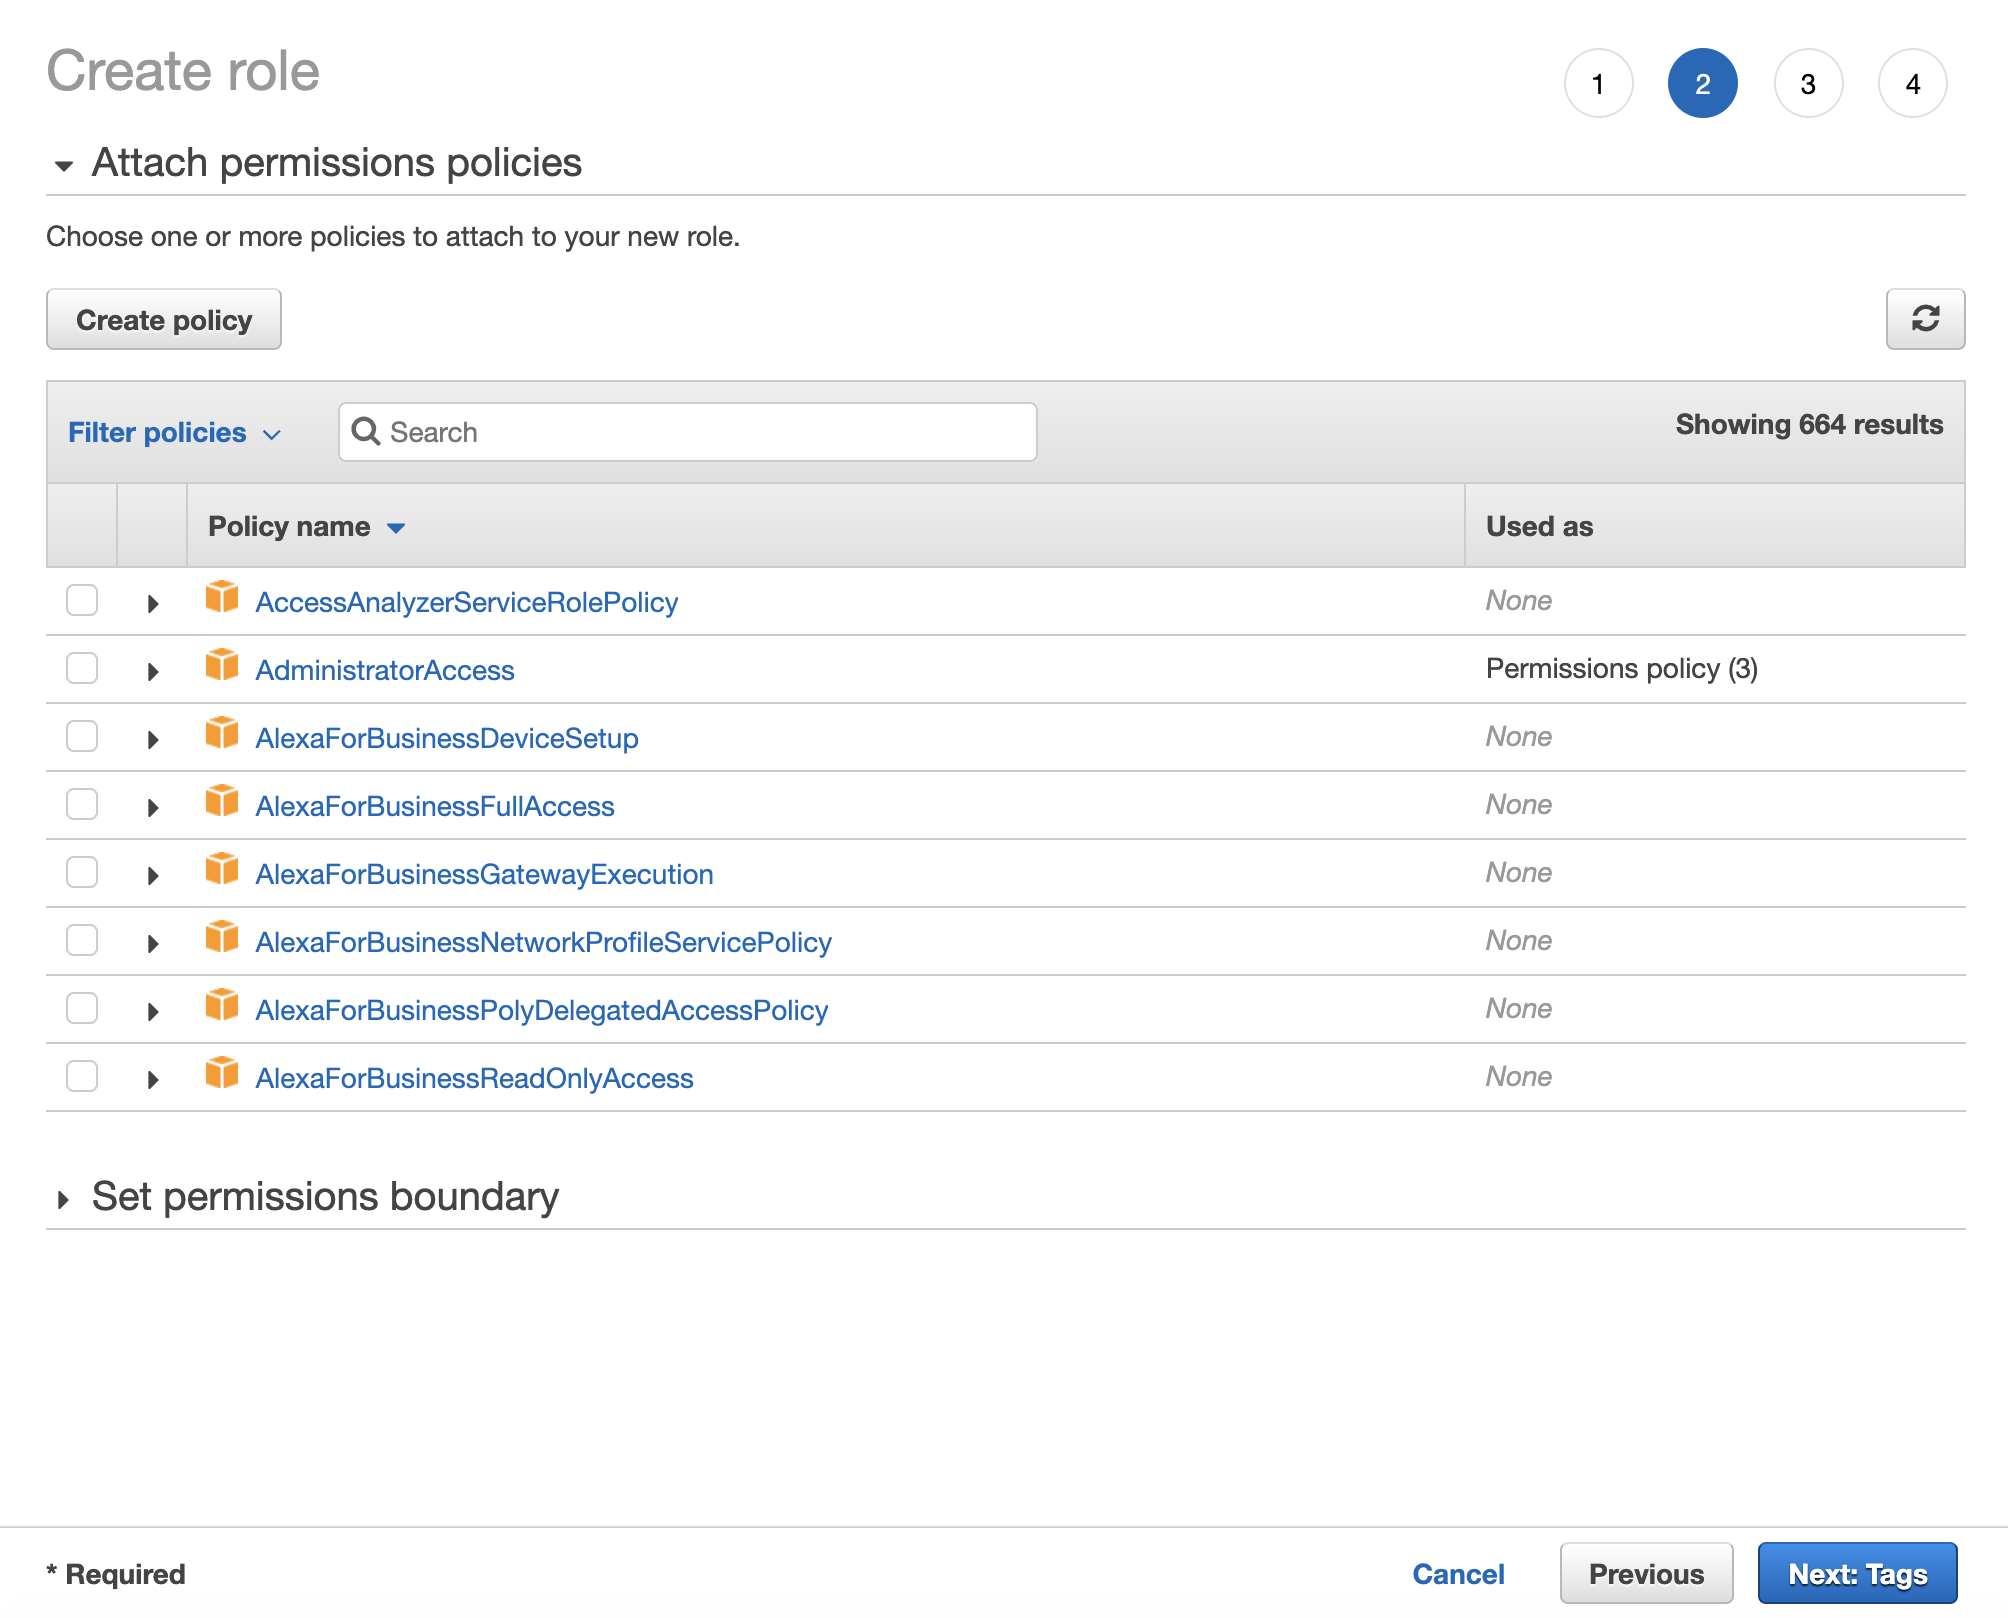
For now, you can ignore setting tags in the next step and just move on to "Review", name your role and click "Create Role" to finish. You will be taken to the view with the list of all roles in your account. Find the role you just created and click it to view its details.
First item in the role summary is Role ARN, which is needed to complete SNS setup in Telestream Cloud console (as is the SNS Topic ARN).

Adding ARNs and selecting events in Telestream Cloud web console
Go back to Telestream cloud console and paste Role ARN and SNS Topic ARN into their respective fields.
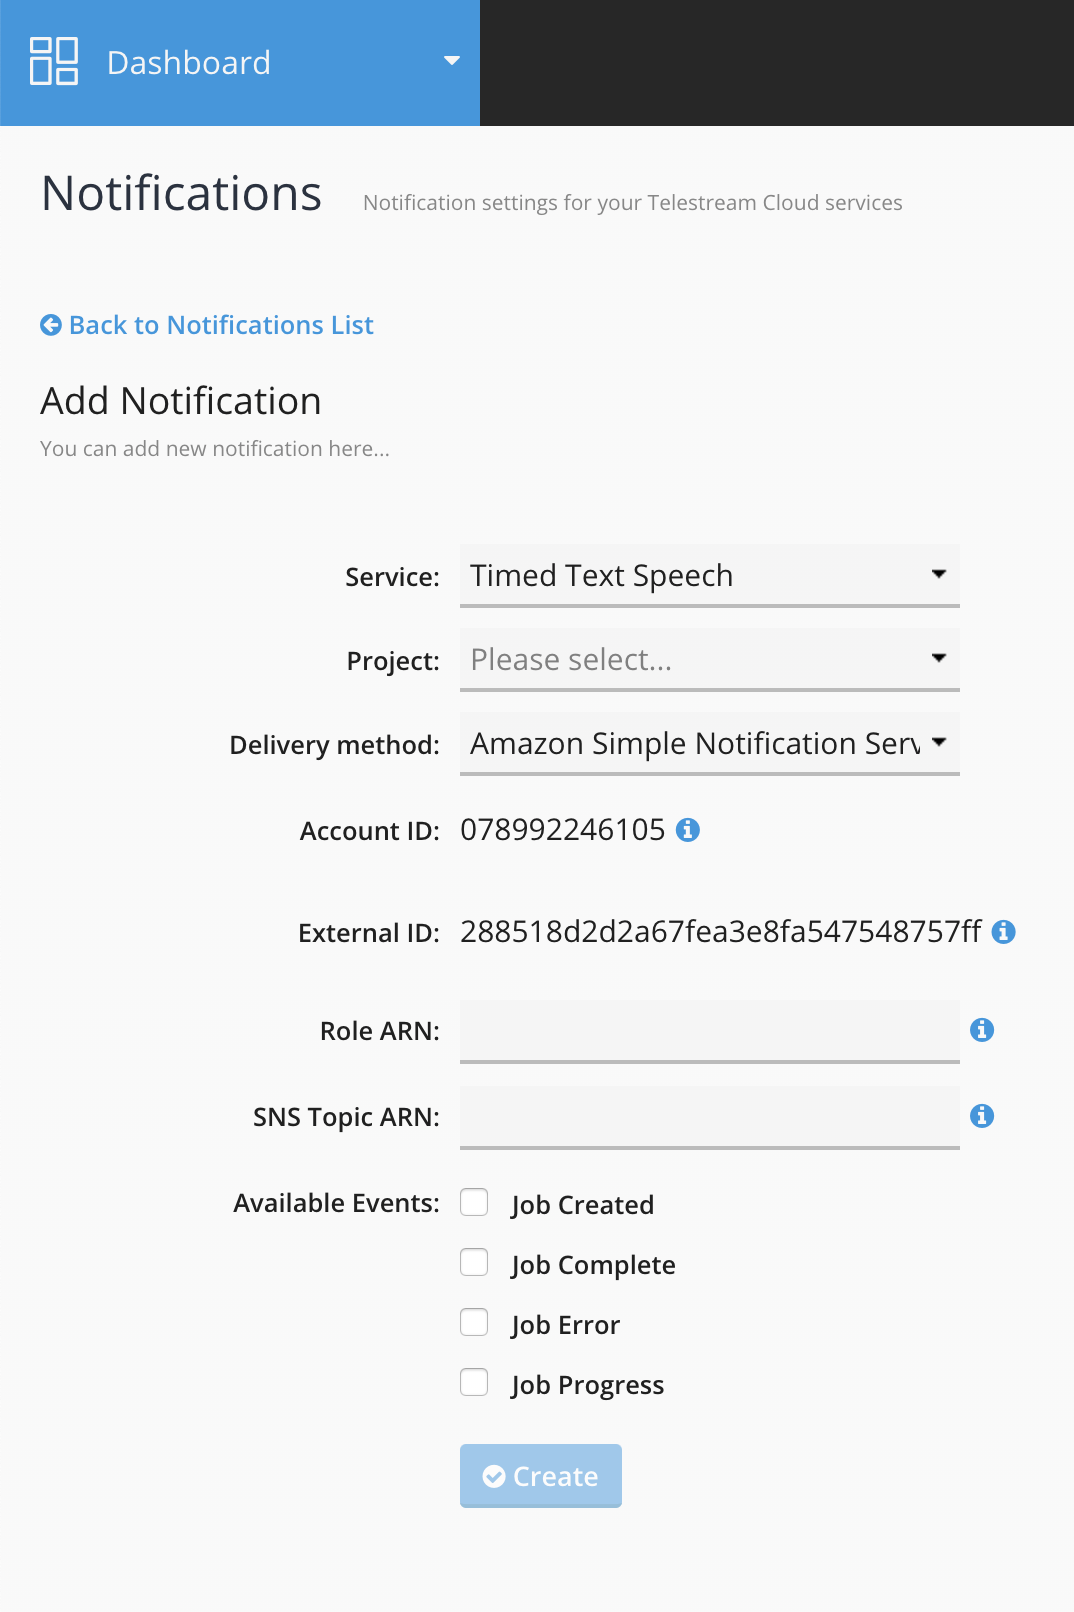
The finals step is choosing the events you wish to be notified of. Available event types are dependent on the service - check out Types of events article for reference.
Click "Create" to add notification. You can now test it by simply running a job through the selected service.
Updated almost 6 years ago
