Customizing encoding profiles
Encoding profiles configuration to match your requirements
Each Factory in the Flip service contains a list of encoding profiles which define output files created every time you submit a job.
In this article we will show you how you can customize an encoding profile based on the example H.264 MP4 output with AAC audio. The instructions apply to pretty much all other profiles in the Flip service, with some differences depending on the video codec and output format selected.
General
This group of settings is mainly focused on container configuration. Depending on the output type you can:
- set container format and file extension
- set custom output path for files that will be encoded using this profile
- enable closed captions preservation, they will be passed-through unchanged to the output files
- decide to keep BT.709 color metadata from source
- select GOP structure from the pre-defined list
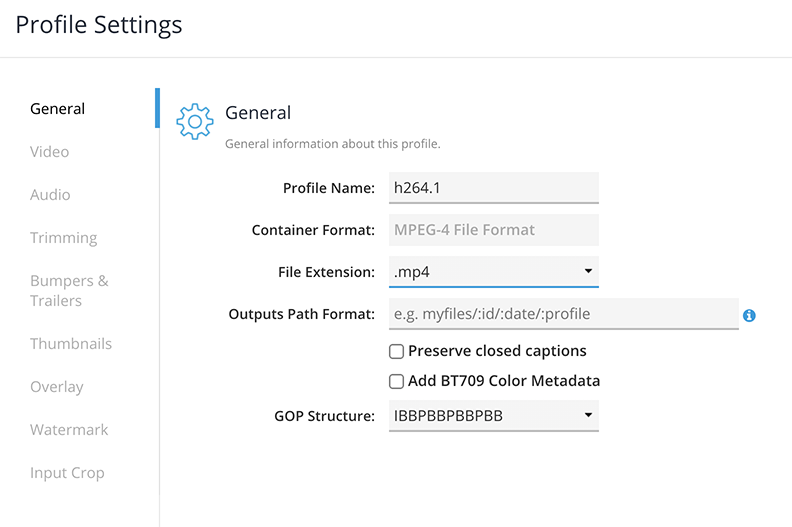
Profile Settings - General
Video
Section that is likely to be the most important to you, as this is where key video settings are grouped. This is where you define:
- codec-specific settings which influence video quality (profiles, levels, bitrate etc.)
- image size and aspect ratio
- resizing behavior when the output has a different image size to the source
- de-interlacing scenarios; Auto means automatic detection of field parity while Always will do de-interlacing every time; preserve fps and double fps option will produce either one frame for each frame or one frame for each field respectively.
The Video Processor setting is responsible for selecting the frame rate conversion method to utilize. This is important for media professionals who deal in mixed broadcast standards and formats. There are several methods available for this kind of conversion:
- Standard, a simple conversion which adds or removes frames to convert between rates
- Advanced, utilizes advanced algorithms to detect movement between frames, create extra frames, and achieve smoother output than the Standard processor
- Tachyon, utilizes Cinnafilm's GPU-based motion-compensated frame rate conversion, de-interlacing, rescaling, inverse telecine and cadence correction solution, to achieve the best results available
To find out more about Tachyon check our Tachyon standards conversion settings article.
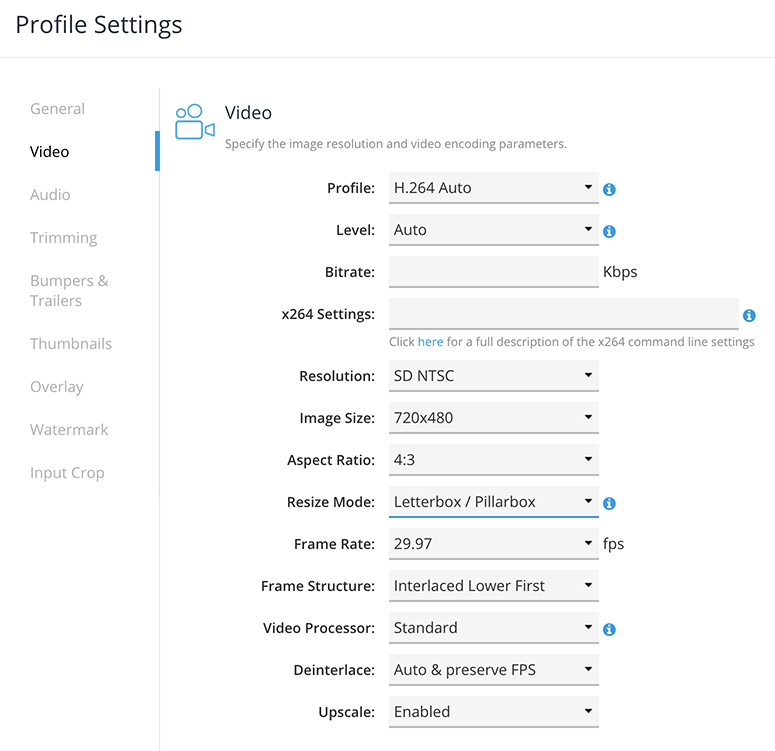
Profile Settings - Video
Audio
The Audio tab gives you control over audio output parameters and the ability to do channel mapping (map audio input channels to output channels, e.g downmix 5.1 to stereo or create stereo output from 2 mono channels). Available options will depend on the selected audio codec (apart from common settings like program/channel configuration, sample rate or bitrate).
AAC is the audio codec most commonly used with H.264 or H.265. It comes in Low Complexity (LC) and High Efficiency (HE) profiles. HE profiles are optimized for low-bitrate applications such as streaming audio.
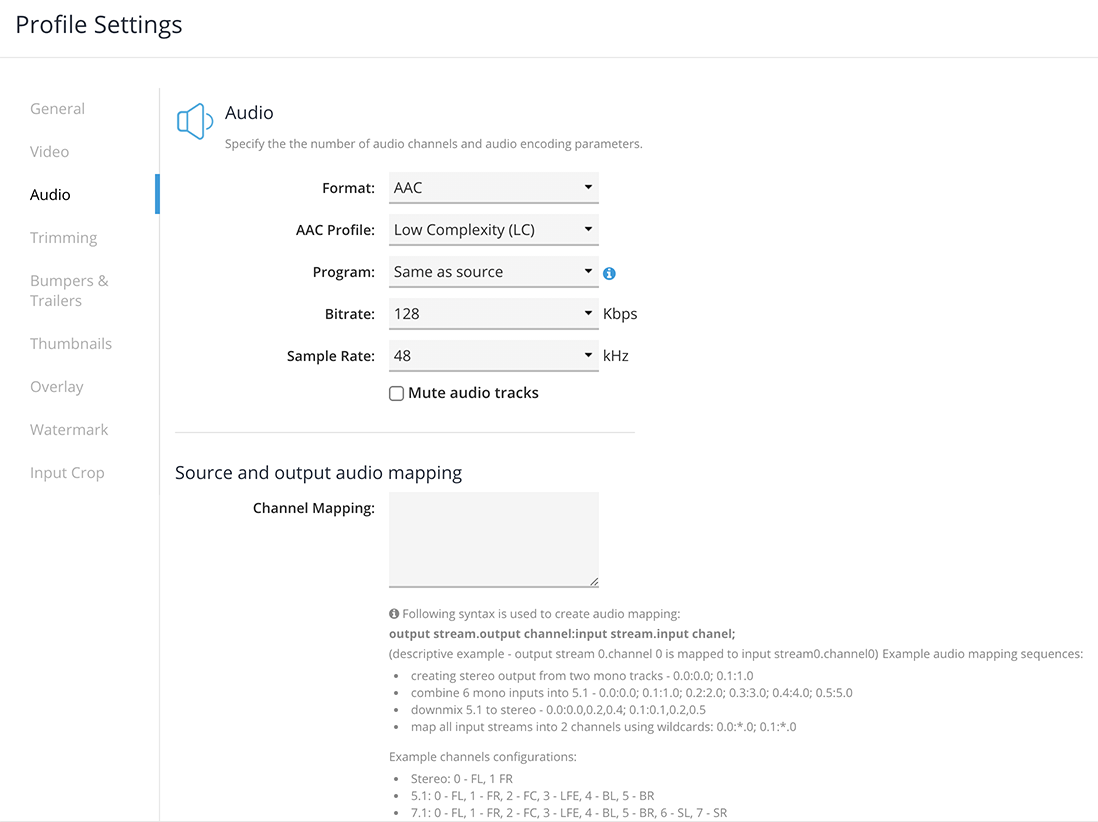
Profile Settings - AAC Audio
Other available audio formats are uncompressed PCM (16 and 24 bit) and Dolby Digital/Dolby Digital Plus (also known as AC-3 and EAC-3).
Trimming
Allows to encode only part of the source file - for example when you want to create a short preview or trailer of the full length video that would be encoded alongside it.
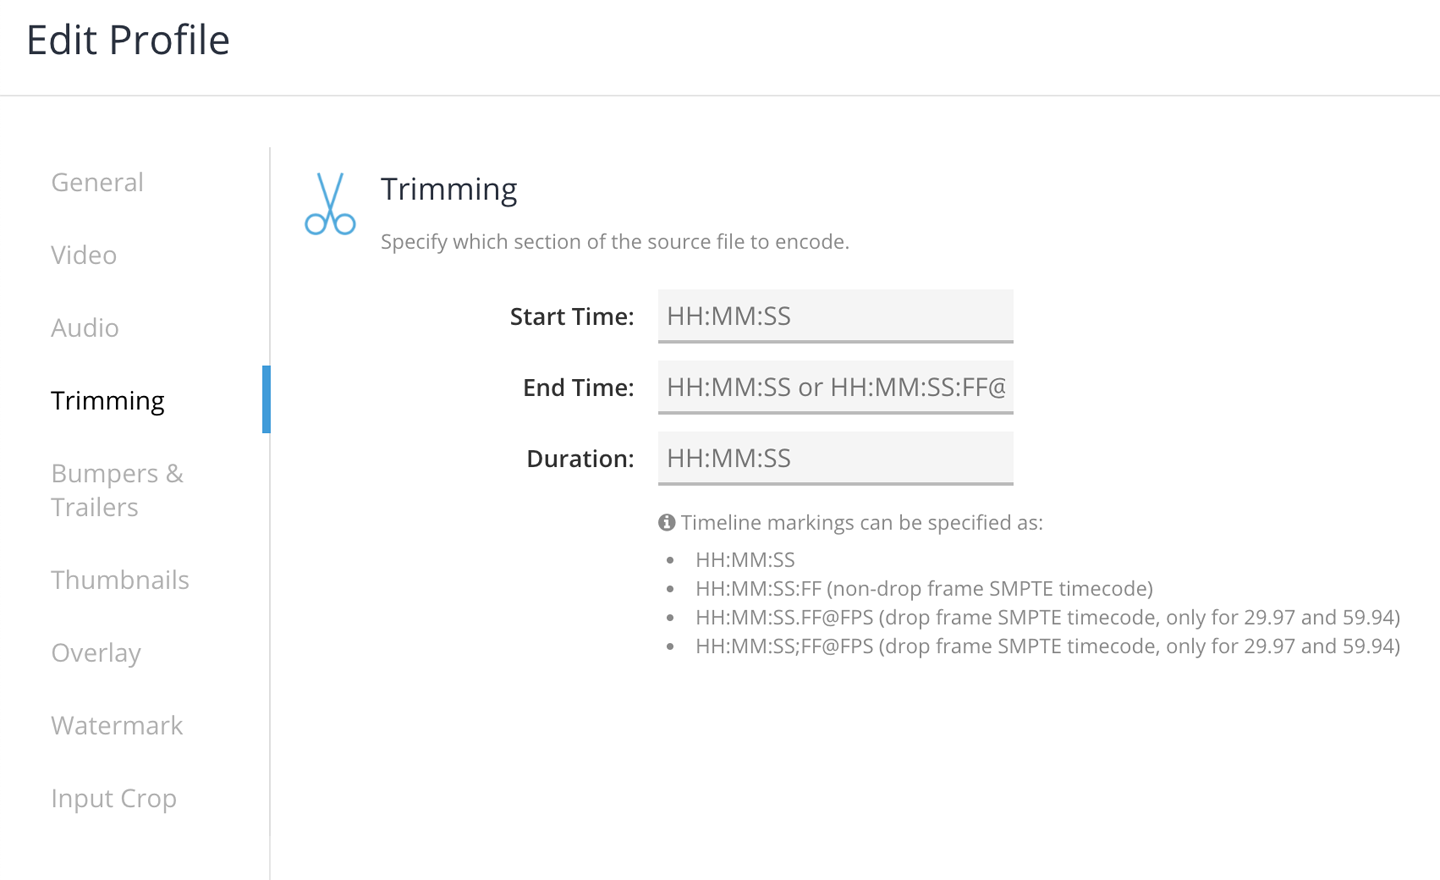
Profile Settings - Trimming
To trim the video you need to specify either:
- Start timecode and end timecode
- Start timecode and duration
Timecodes should be provided in one of the following formats:
- HH:MM:SS
- HH:MM:SS:FF (non-drop frame SMPTE timecode)
- HH:MM:SS.FF@FPS (drop frame SMPTE timecode, only for 29.97 and 59.94)
- HH:MM:SS;FF@FPS (drop frame SMPTE timecode, only for 29.97 and 59.94)
Bumpers and Trailers
Bumpers and trailers are usually a short, about 10 seconds, piece of video attached to the beginning and at the end of the main video clip. Typical use cases would be to display a broadcaster logo or intro before/after advertising breaks, or some essential information about the main clip for internal use.
In Flip you can add bumpers and trailers by providing a URL to the media file that you would like to stitch with the main video. The additional file(s) will first be normalized to match the video and audio parameters of the main source (like image size, aspect ratio or audio properties), then will be stitched together with the main file and transcoded to the final output format.
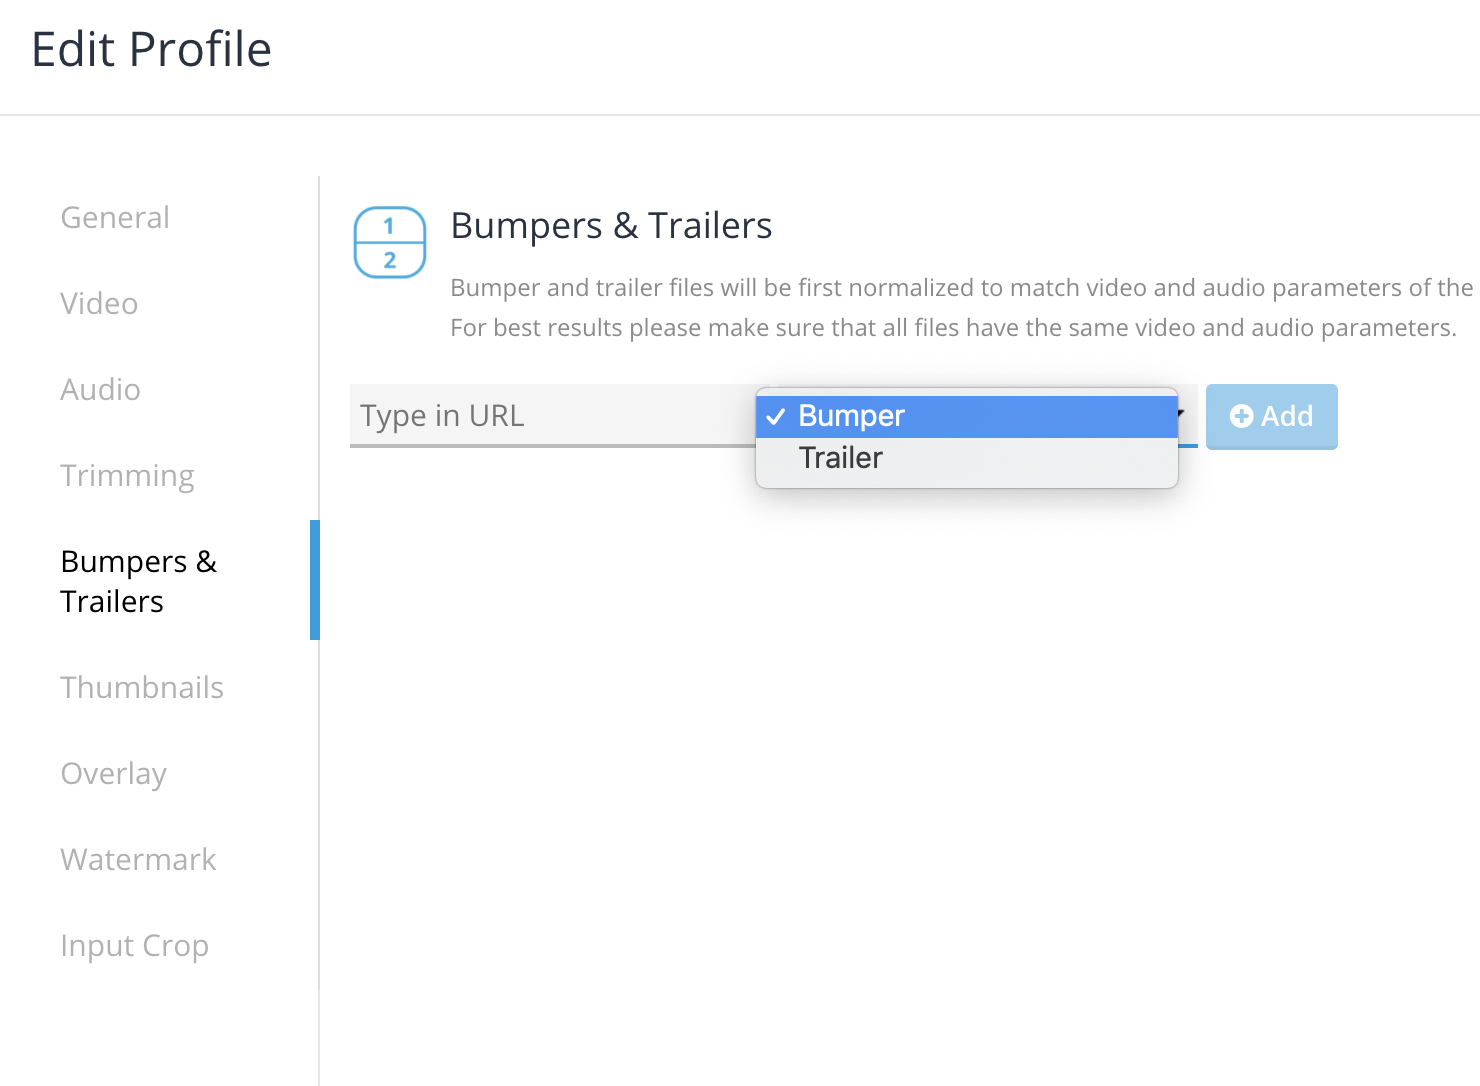
Profile Settings - Bumpers and Trailers
For best results it's recommended that all source files have the same video and audio parameters.
Thumbnails
Optionally creates JPG thumbnail images from the source video. Generated thumbnails will be uploaded to output storage using the same naming convention configured in the output path settings, with the thumbnail number appended.
You can choose between creating X number of evenly spaced thumbnails, creating thumbnails every X seconds, or creating one thumbnail at a specific timecode.
Overlay
In Flip you can add three types of overlays to the encoded video:
- custom text
- a visible timecode
- captions/subtitles burn-in
When adding Custom Text, you simply specify what the text should be, the font size and position, and the timecode at which the text should appear.
Visible Timecode, when enabled, will burn in a timecode which will always appear in the top left corner of the screen.
Enabling Add caption/subtitle burn-in will result in burning any embedded captions onto the video stream. With jobs submitted through the API where you can also add subtitles from external files, this option will burn-in the captions from the first subtitle file.
Watermark
A watermark is essentially an image (a logo, text, pattern) intentionally superimposed onto the video. Its purpose is to make it more difficult for the original to be copied or used without permission.
Flip allows you to add watermarks - either as JPG or PNG images - and define their size and positioning. Size and position can be set using absolute units, pixels in this case. However using percentage of target frame will give you more flexibility should you produce multiple outputs at different image sizes.
Watermarks are always placed within the "safe" area (90% of the total frame size) and the original aspect ratio of the image is preserved.
Input Crop
This lets you crop the input video before encoding either by providing the number of pixels to crop from each edge, or by providing the height and width of the area to keep along with the coordinates of the upper-left pixel to keep.
Updated over 3 years ago
