Watch-folder - Azure
How to set up Azure Blob Storage as output storage in Telestream Cloud
Setting up a watch-folder in Azure is very similar to adding it as output store, but with few extra steps
As previously, let's create a storage account in Azure Portal which will belong to a resource group. When you create a storage account, you have the option to either create a new resource group, or use an existing resource group.
Creating storage account
Log in to Azure Portal and click "Create a resource" on the dashboard.

Pick "Storage account - blob, file, table, queue" from available options to start configuration.
Select preferred subscription model and either create a new Resource group or use an existing one. Next, are the instance details. Enter a name for your storage account. It must be unique across Azure and be between 3 and 24 characters in length, and can include numbers and lowercase letters only.
Location choice is strongly dependent on where do you plan to process your files and their final destination. If your source files are in the US East it's recommended to use this region to limit latency and egress costs when moving files.
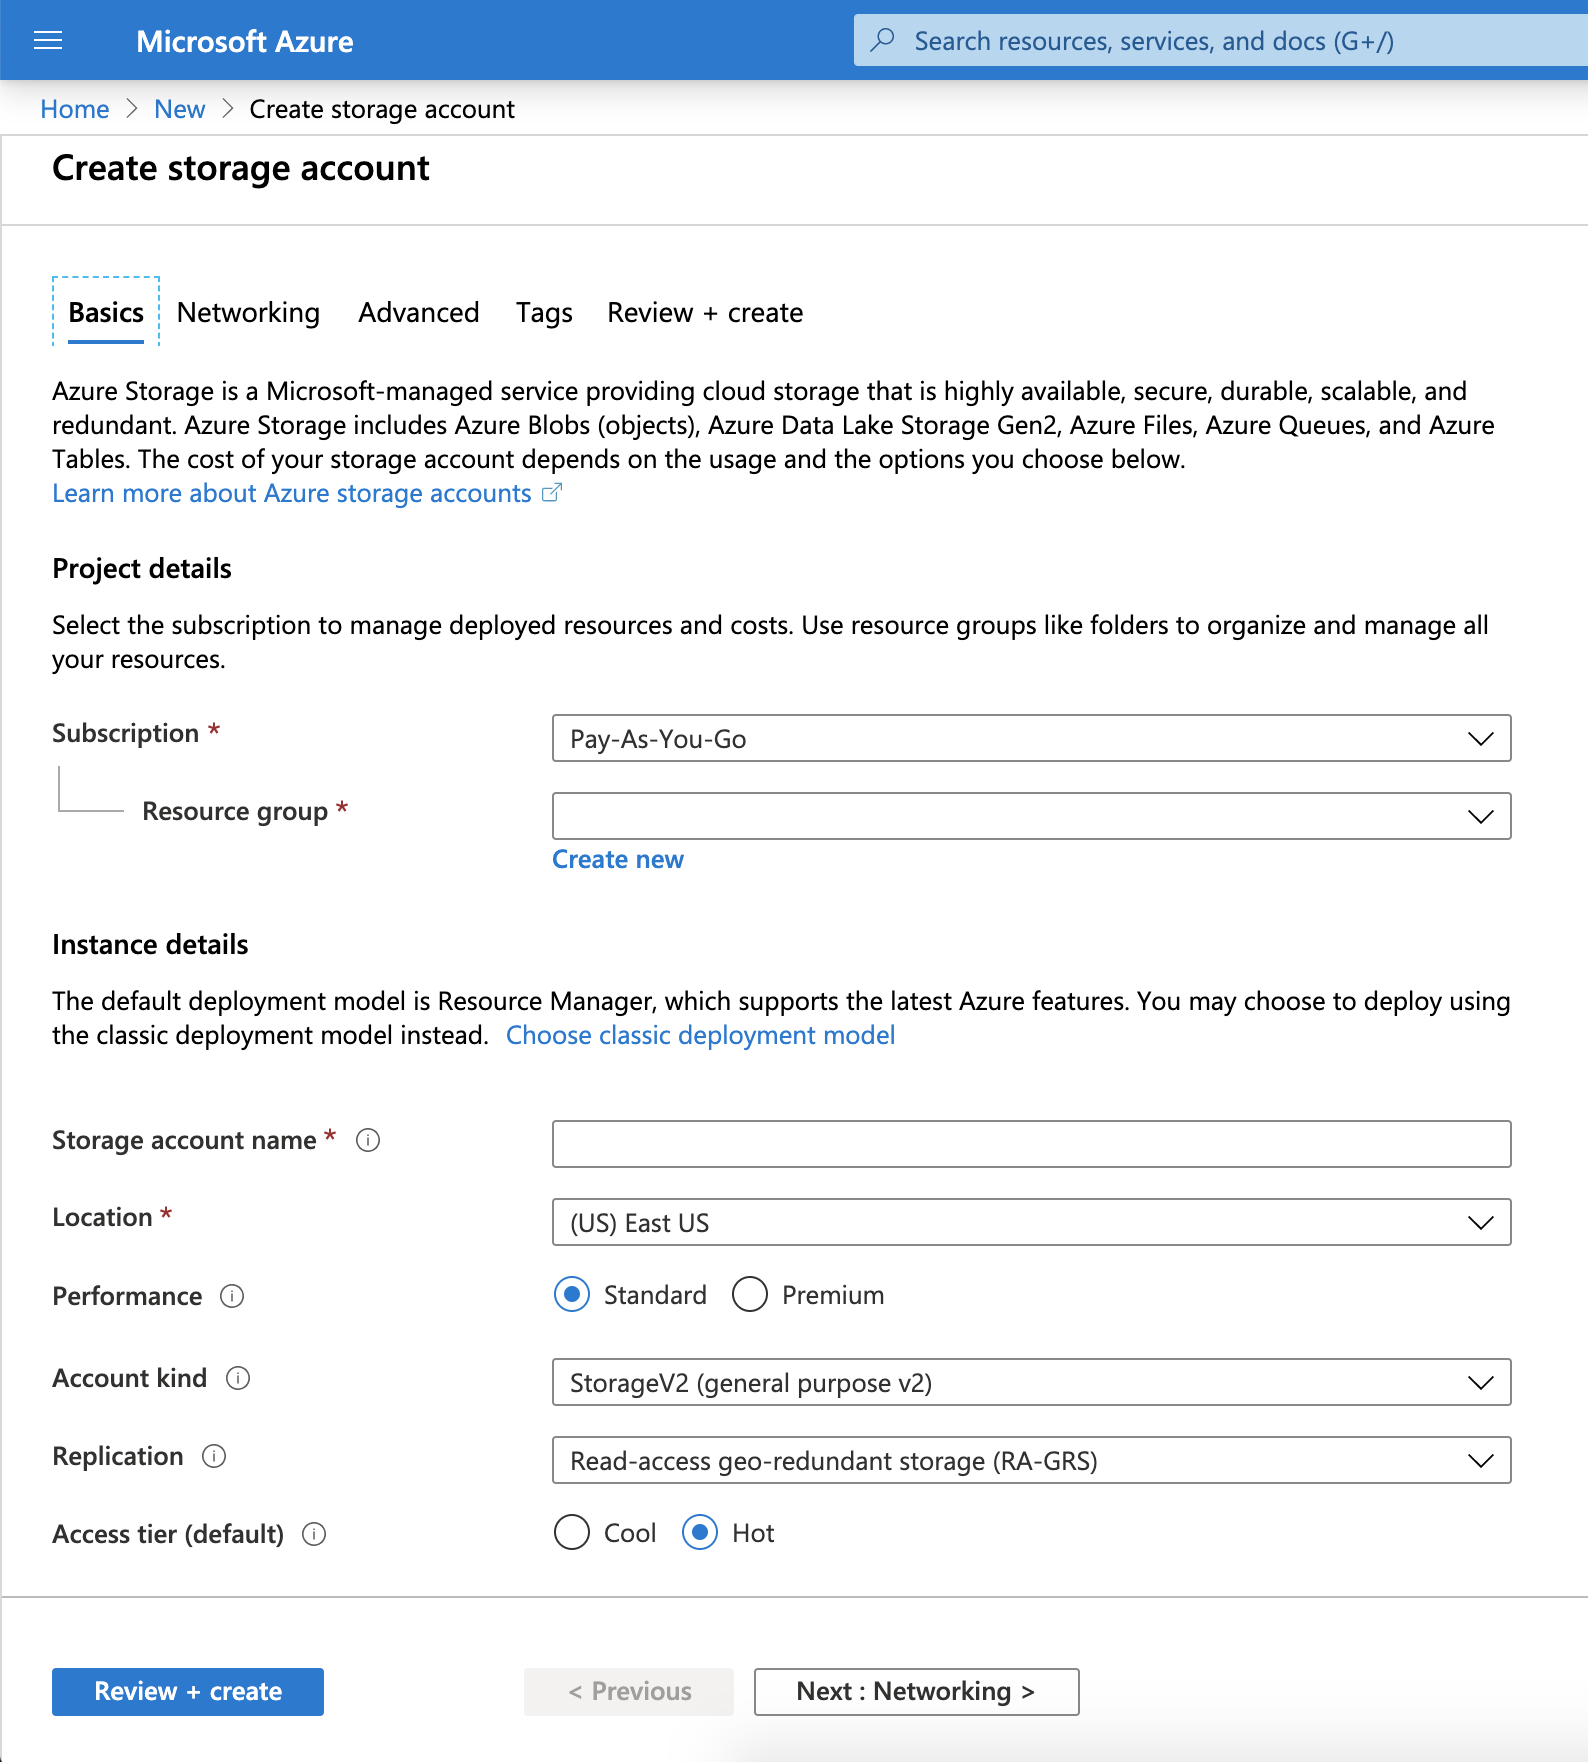
You can leave other settings at their default values. Click "Review + Create" to finish.
Create a container
From the dashboard go to Storage Accounts view and click your newly created account. Scroll down do Blob Storage section and click "Containers". Or click the "Containers" button in central part of the screen.
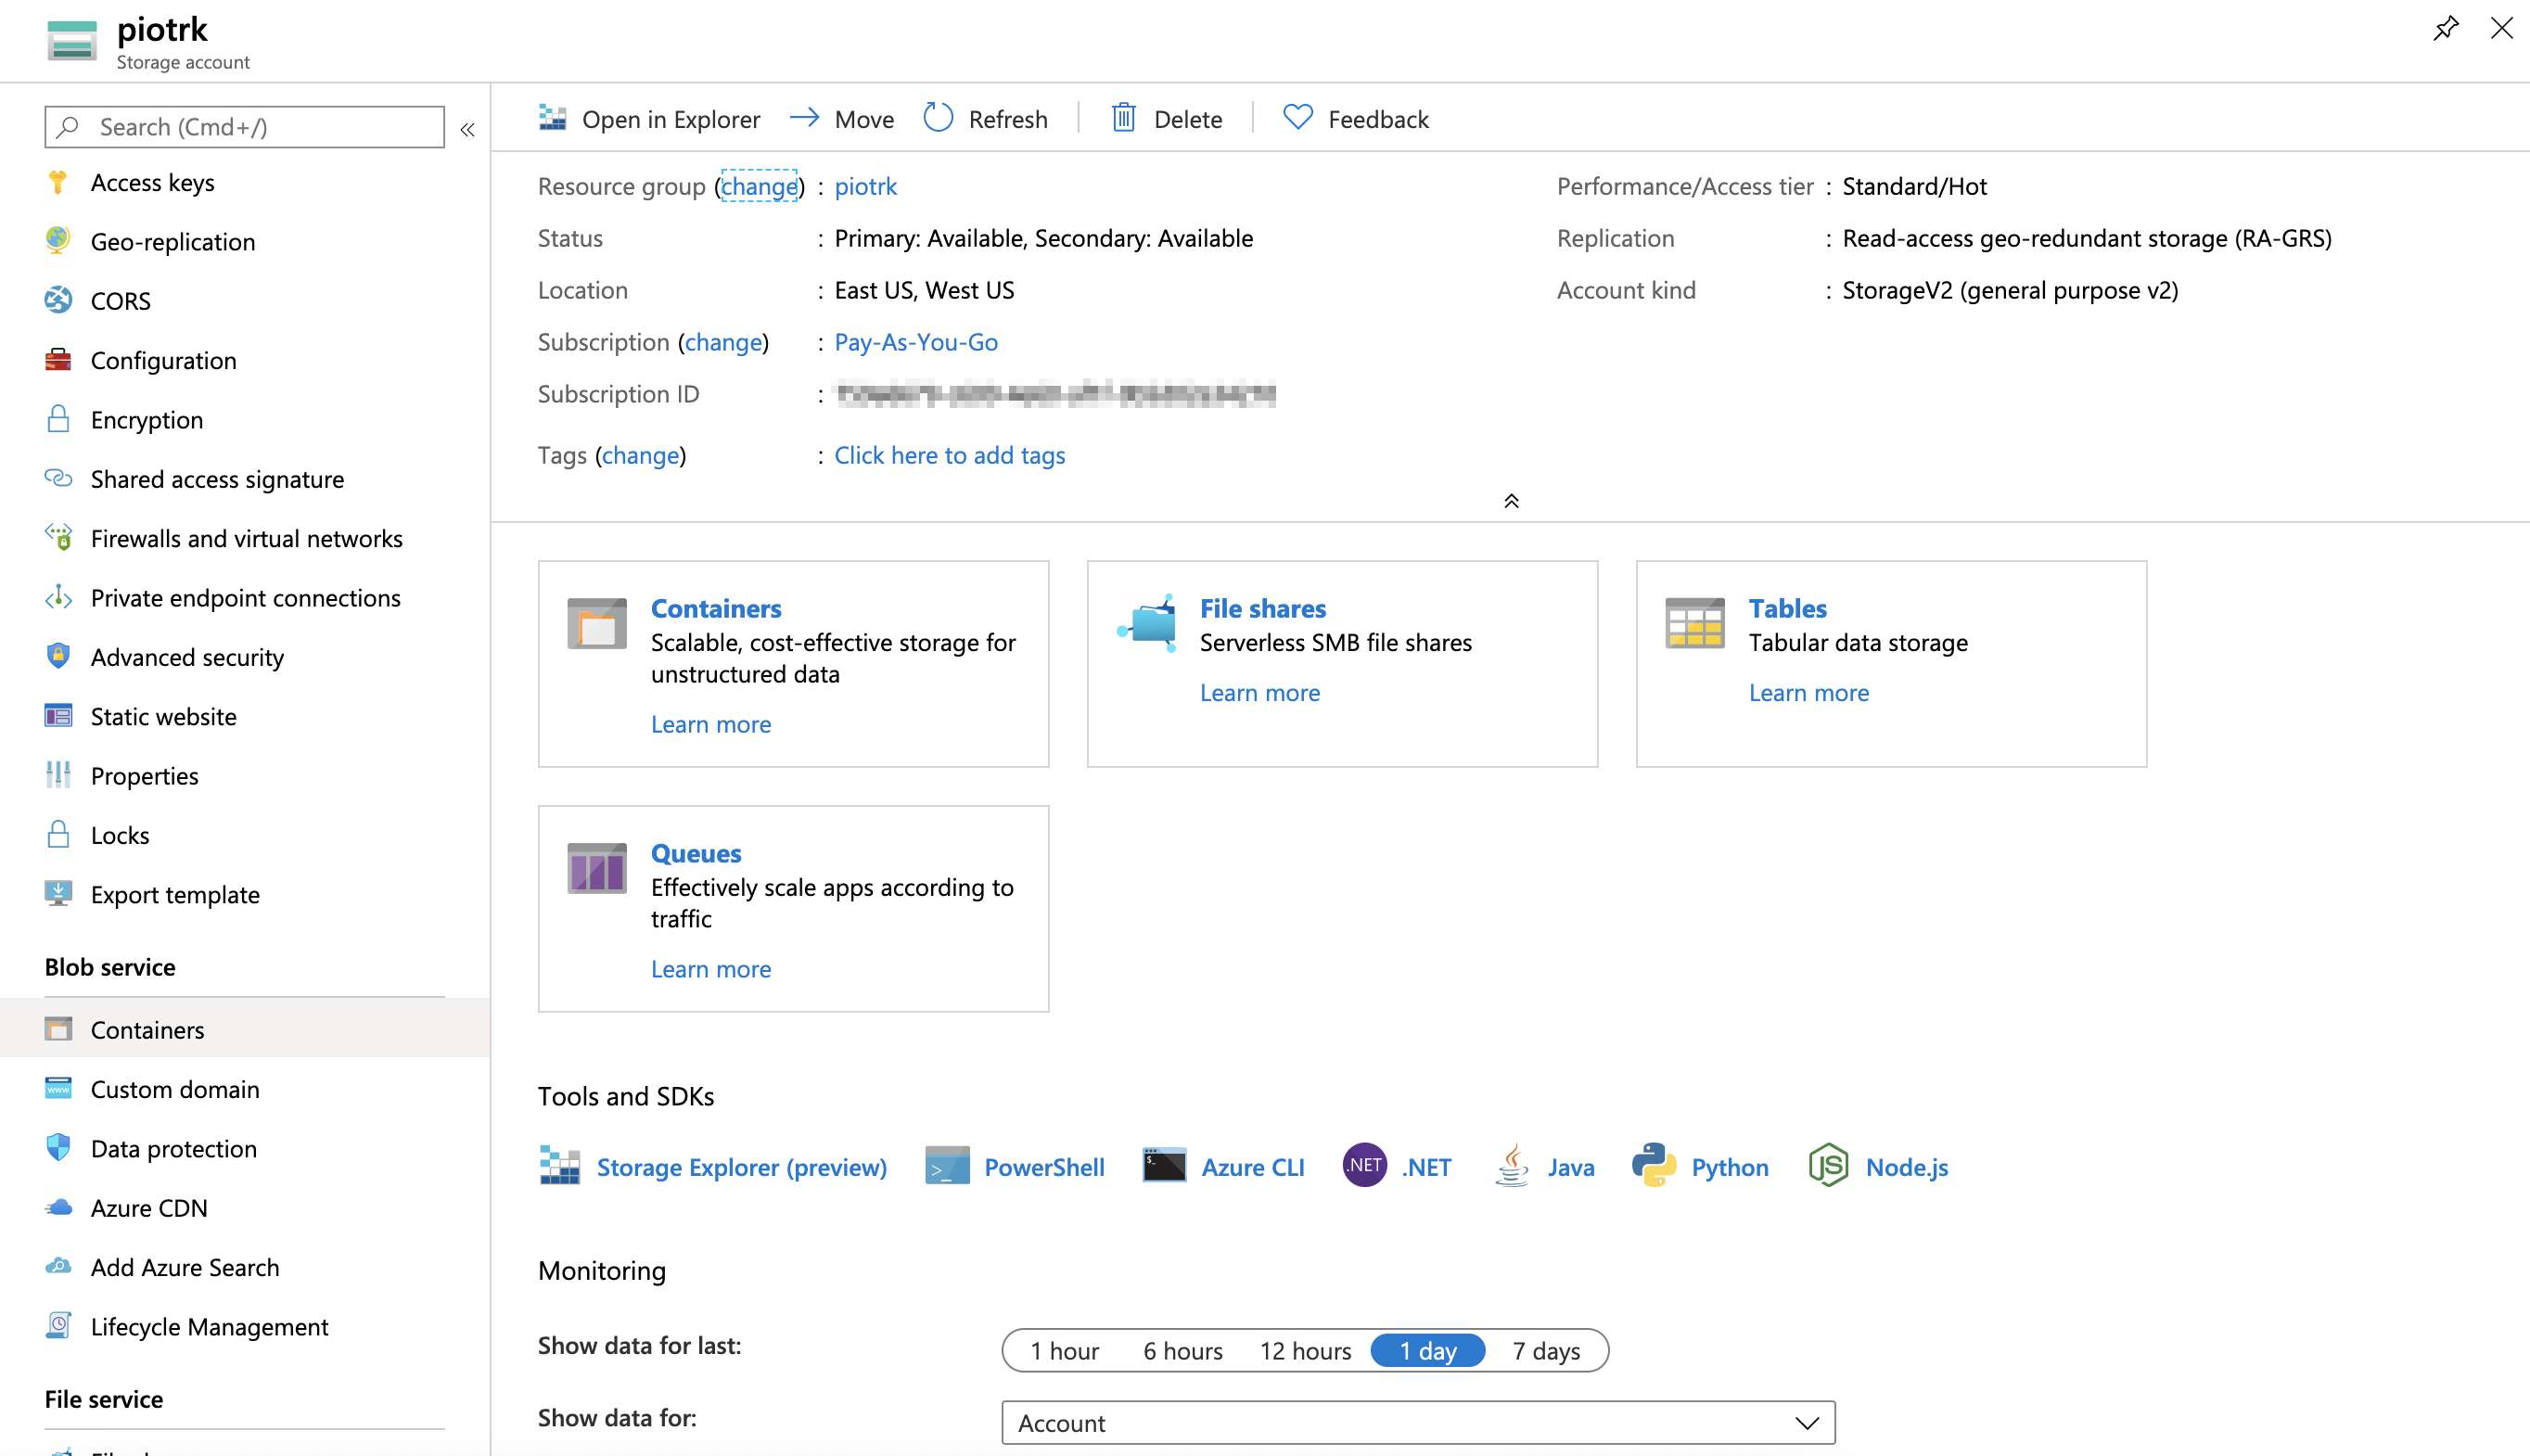
To add a new Container click "+ Container" above the list of containers. You will see a side panel expand where you enter a name for your container and access level. Leave it at default setting - Private. Click Create and you're done.

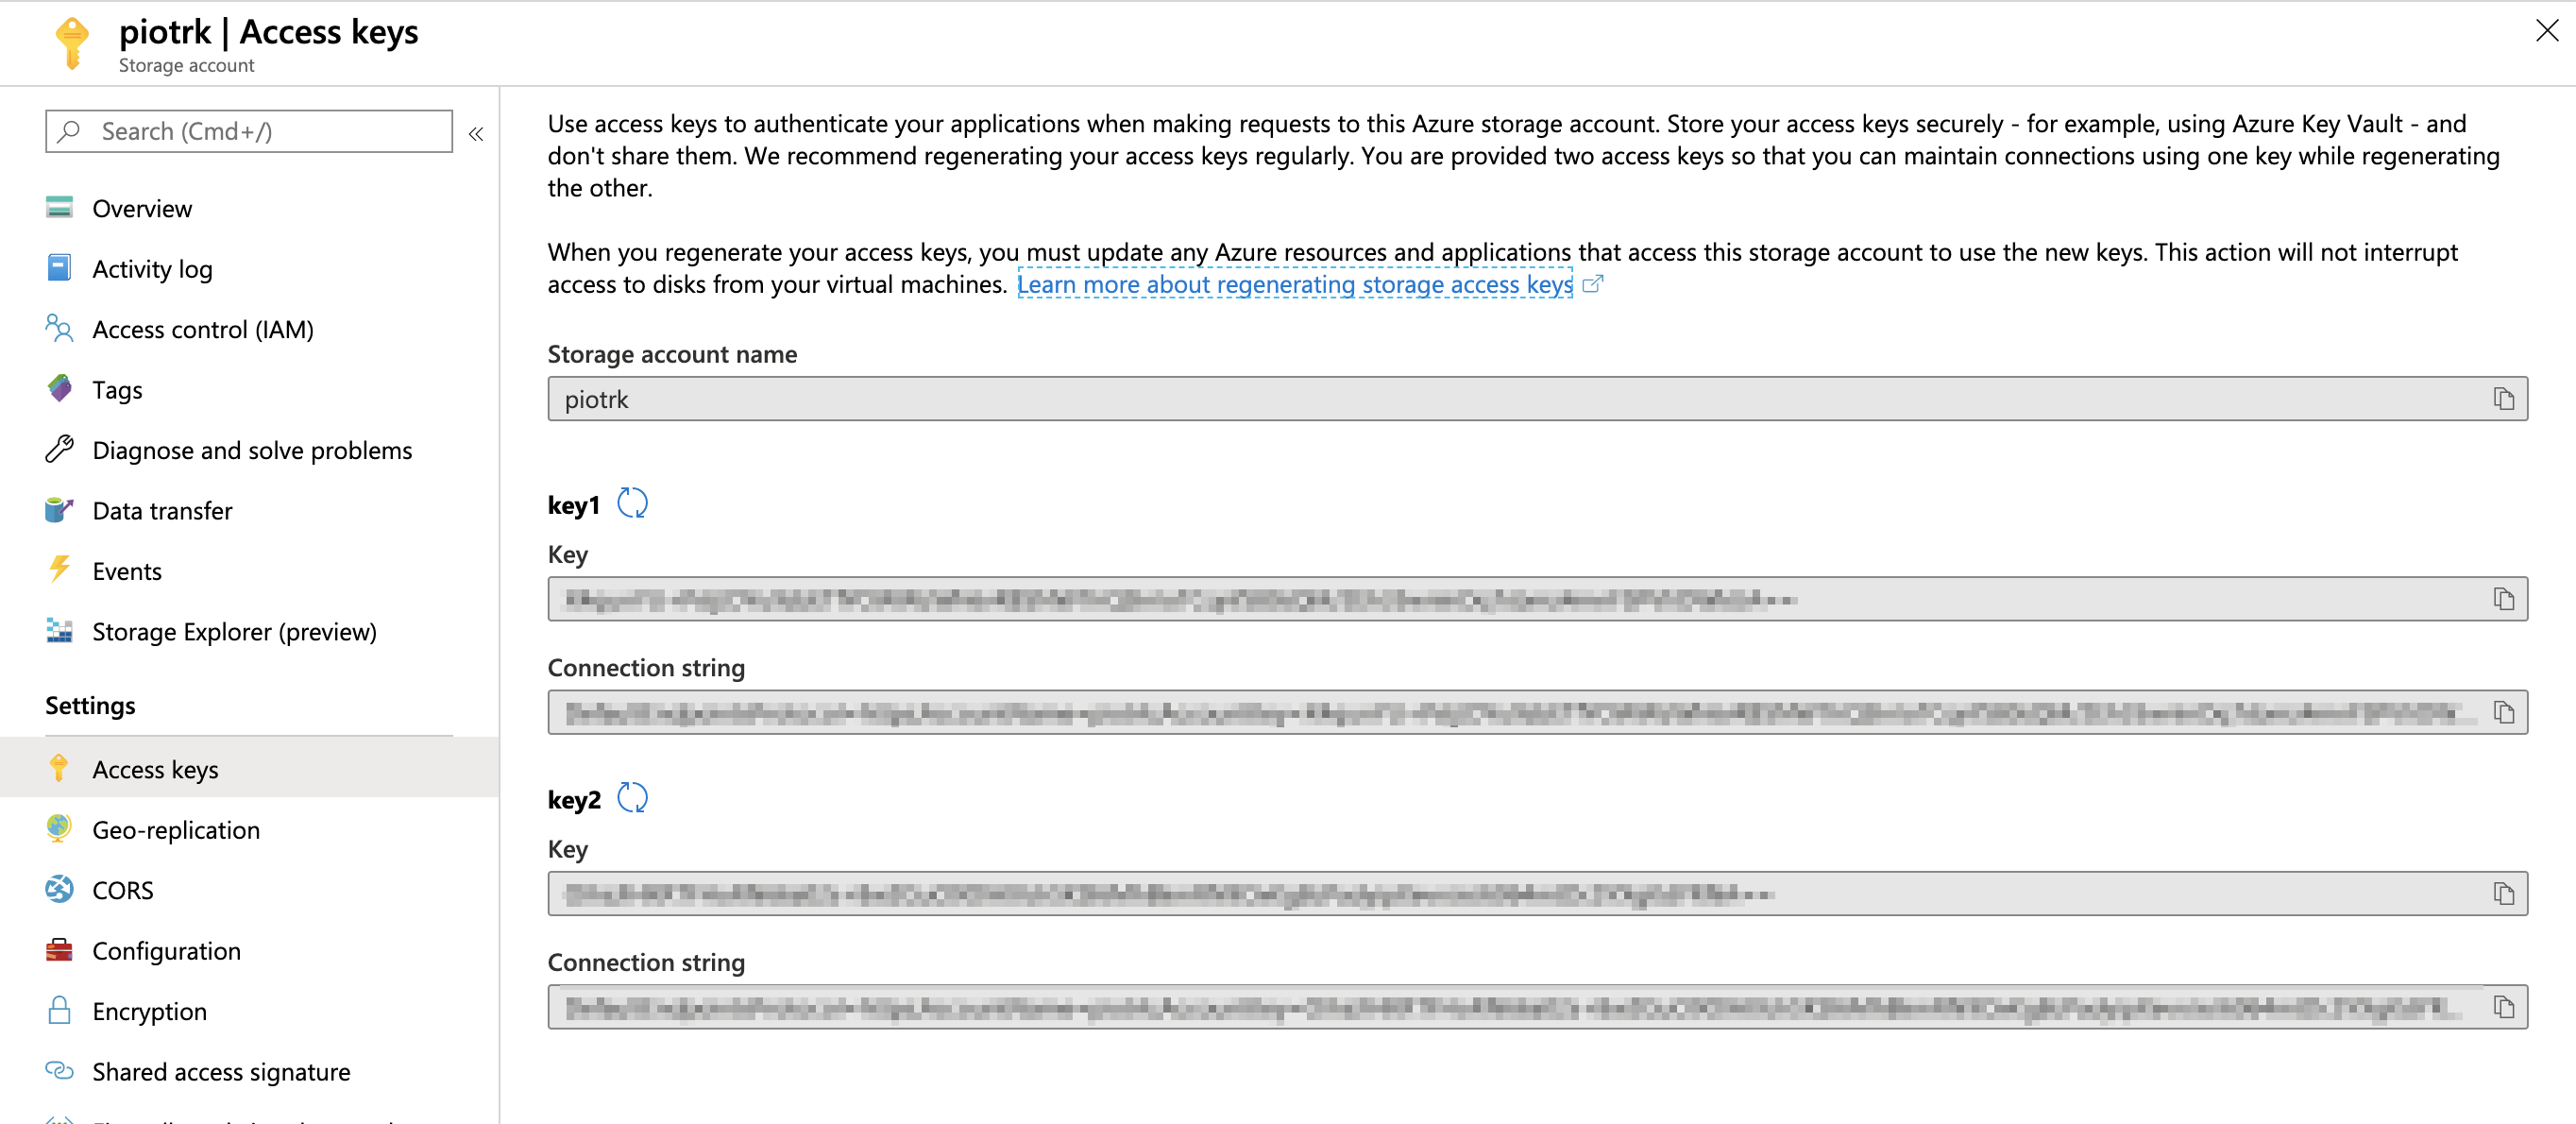
Now go to "Access Keys". This is where you can see access keys to your storage account. You will need it when adding store to Telestream Cloud. Copy key 1 so you can paste it later in the Azure storage config form.
Adding your store to Telestream Cloud
Login to your Telestream Cloud account and go to Manage Stores.

Click "Add Store" and select Azure Blob Storage as output store. Give the store a name then enter the name of the storage account you created in Azure and Storage Access Key you copied from Azure Portal. Enter the name of your container and check "Configure as Input Store".
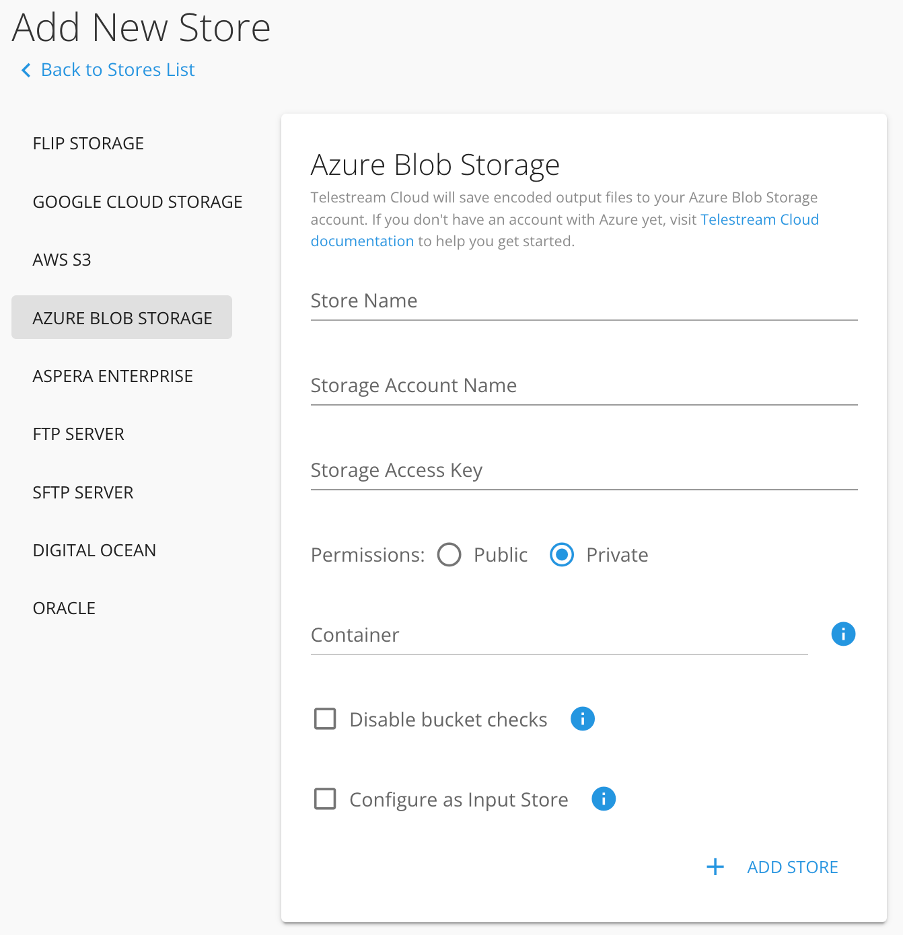
This will expand the form asking you to provide some extra information required for watch-folder to work successfully on Azure.
We recommend to contact your IT department to obtain that data. Accessing it may require certain level of rights which may not be granted to every user.
Resource group
Name of the resource group to which your storage belongs to
Subscription ID
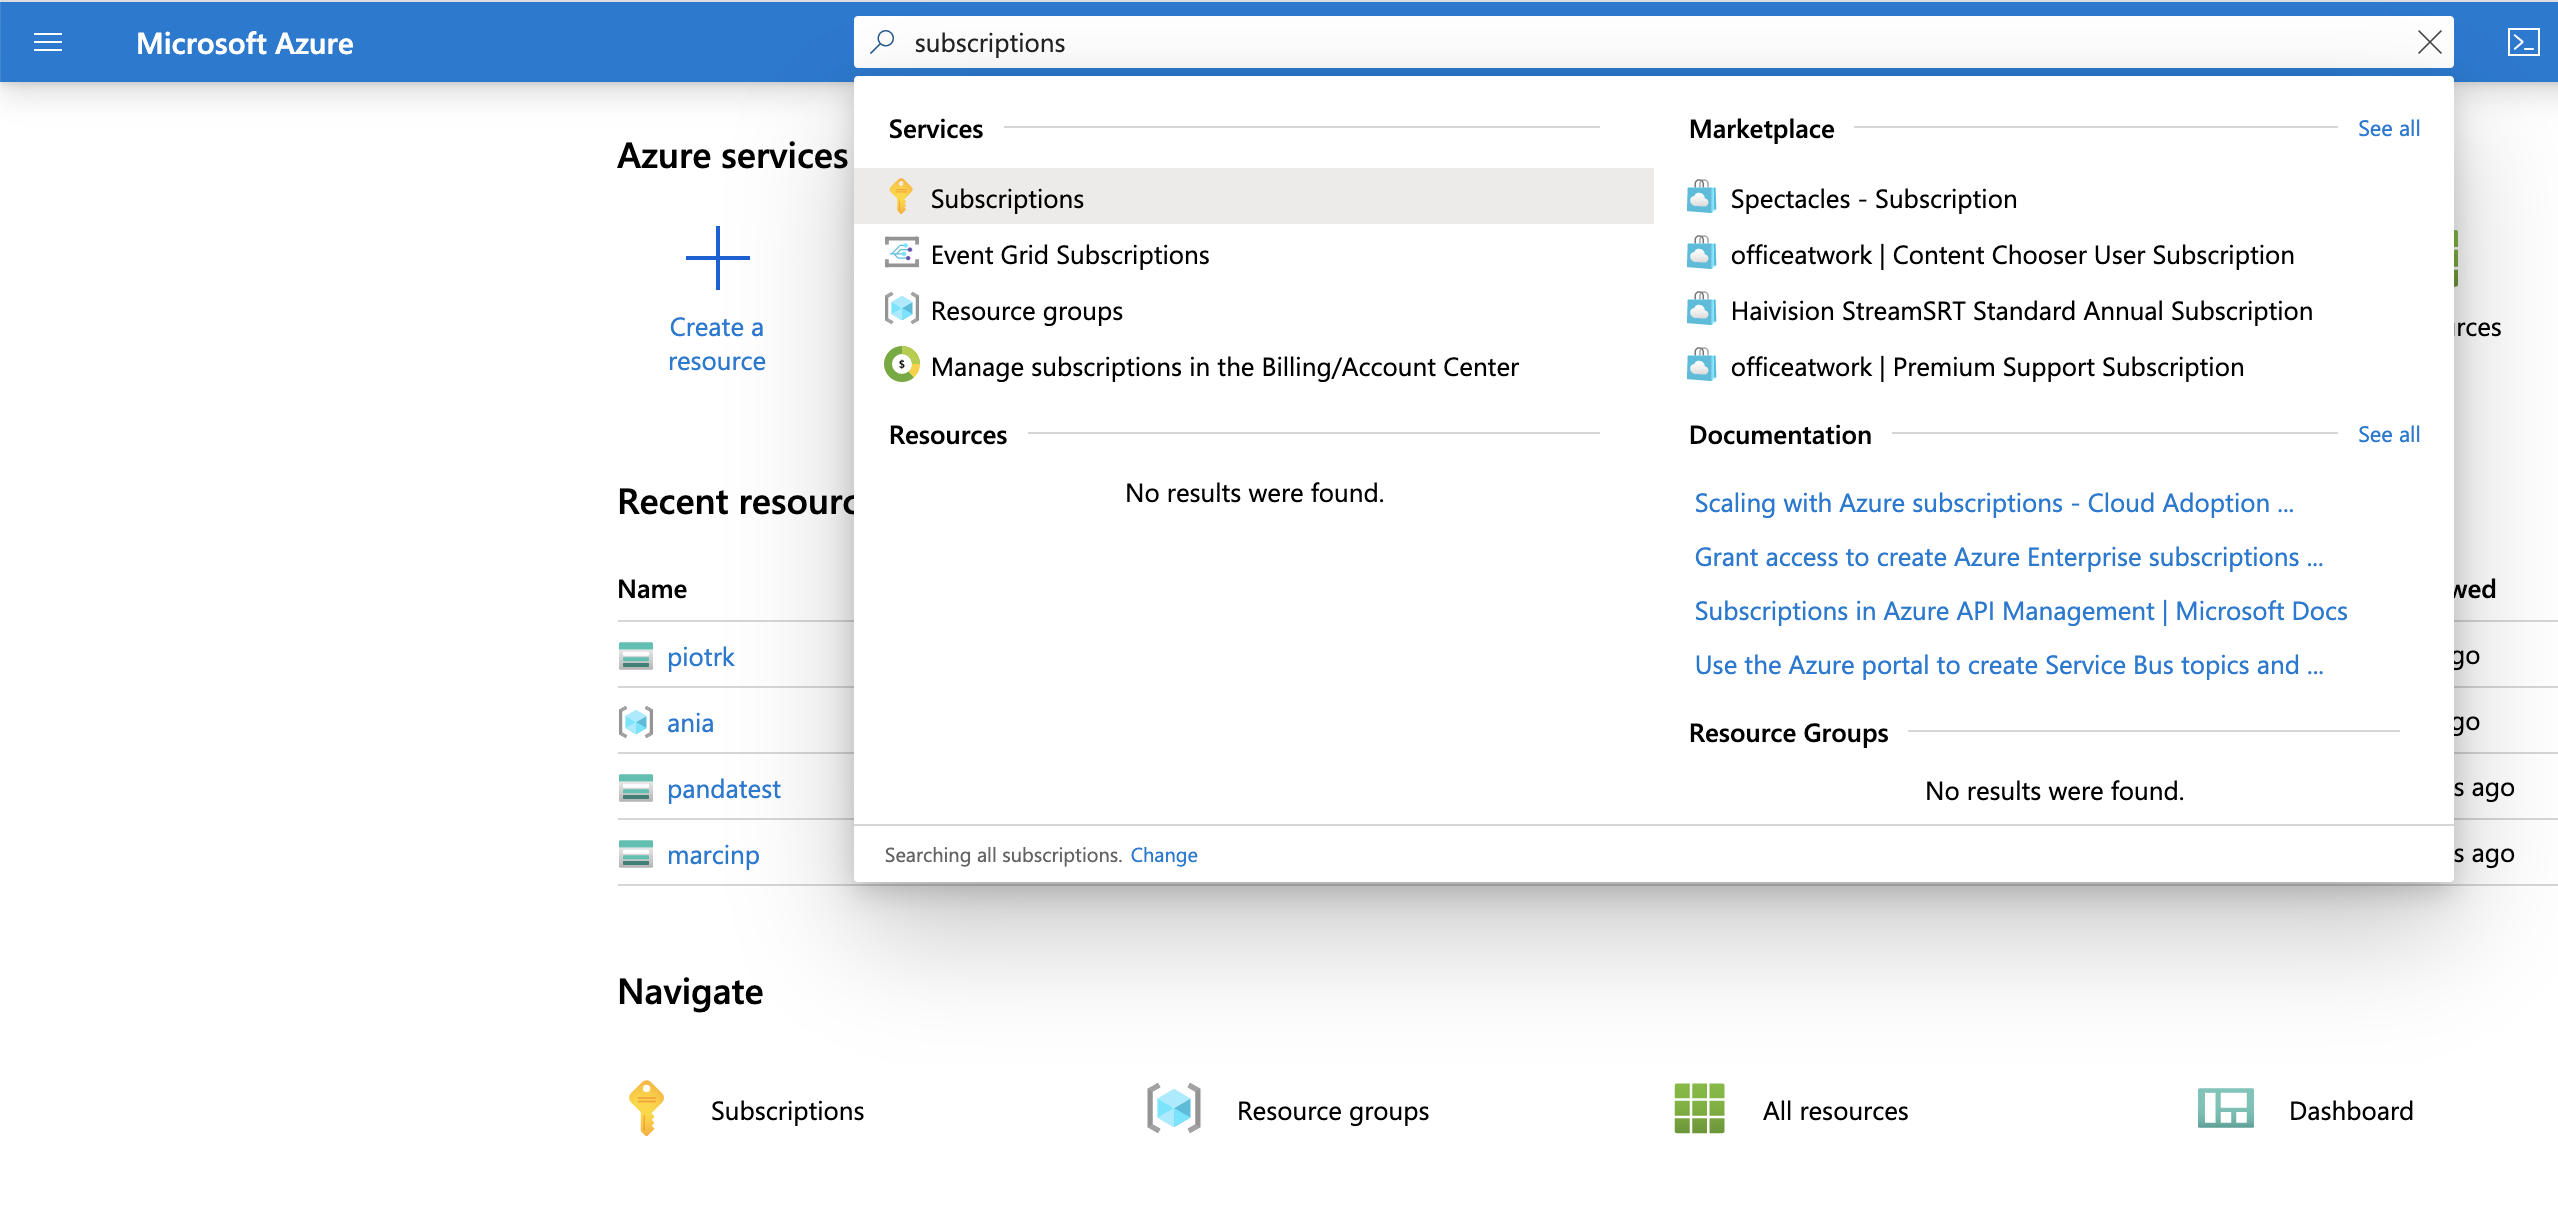
The subscription ID uniquely identifies your subscription to use Azure services. It's displayed in the Subscriptions view of your Azure account. You can also simply search for it in the search field on top of the dashboard.
Tenant ID
To retrieve your Tenant ID select Azure Active Directory from the left sliding menu. Tenant ID will be displayed in the Overview page of your Azure AD.
Client ID
Client ID is tied to Managed Identities which provides a way to authenticate to Azure Key Vault which stores credentials, secrets and other keys for secure access to cloud services.
To find your Client ID search for Managed Identities in the top search bar to display list of identities associated with your subscription. Select the one that applies. Client ID will be shown in the overview page.
Click "Add store" to complete the process. You can now proceed to setting watch rules.
Configure Watch Rules
Watch rules in general define which Factory or Project in any Telestream Cloud will use the watch-folder as source and allow you to control what types of files are going to be processed. To define a watch rule click "+" button in the Watch Rules column on the list of stores.

This will take you to the Add Watch Rule config view. Pick the service and a Factory/Project that should use this watch-folder and optionally define a path pattern. If you leave it blank, any file that arrives at this watch-folder will trigger a job.
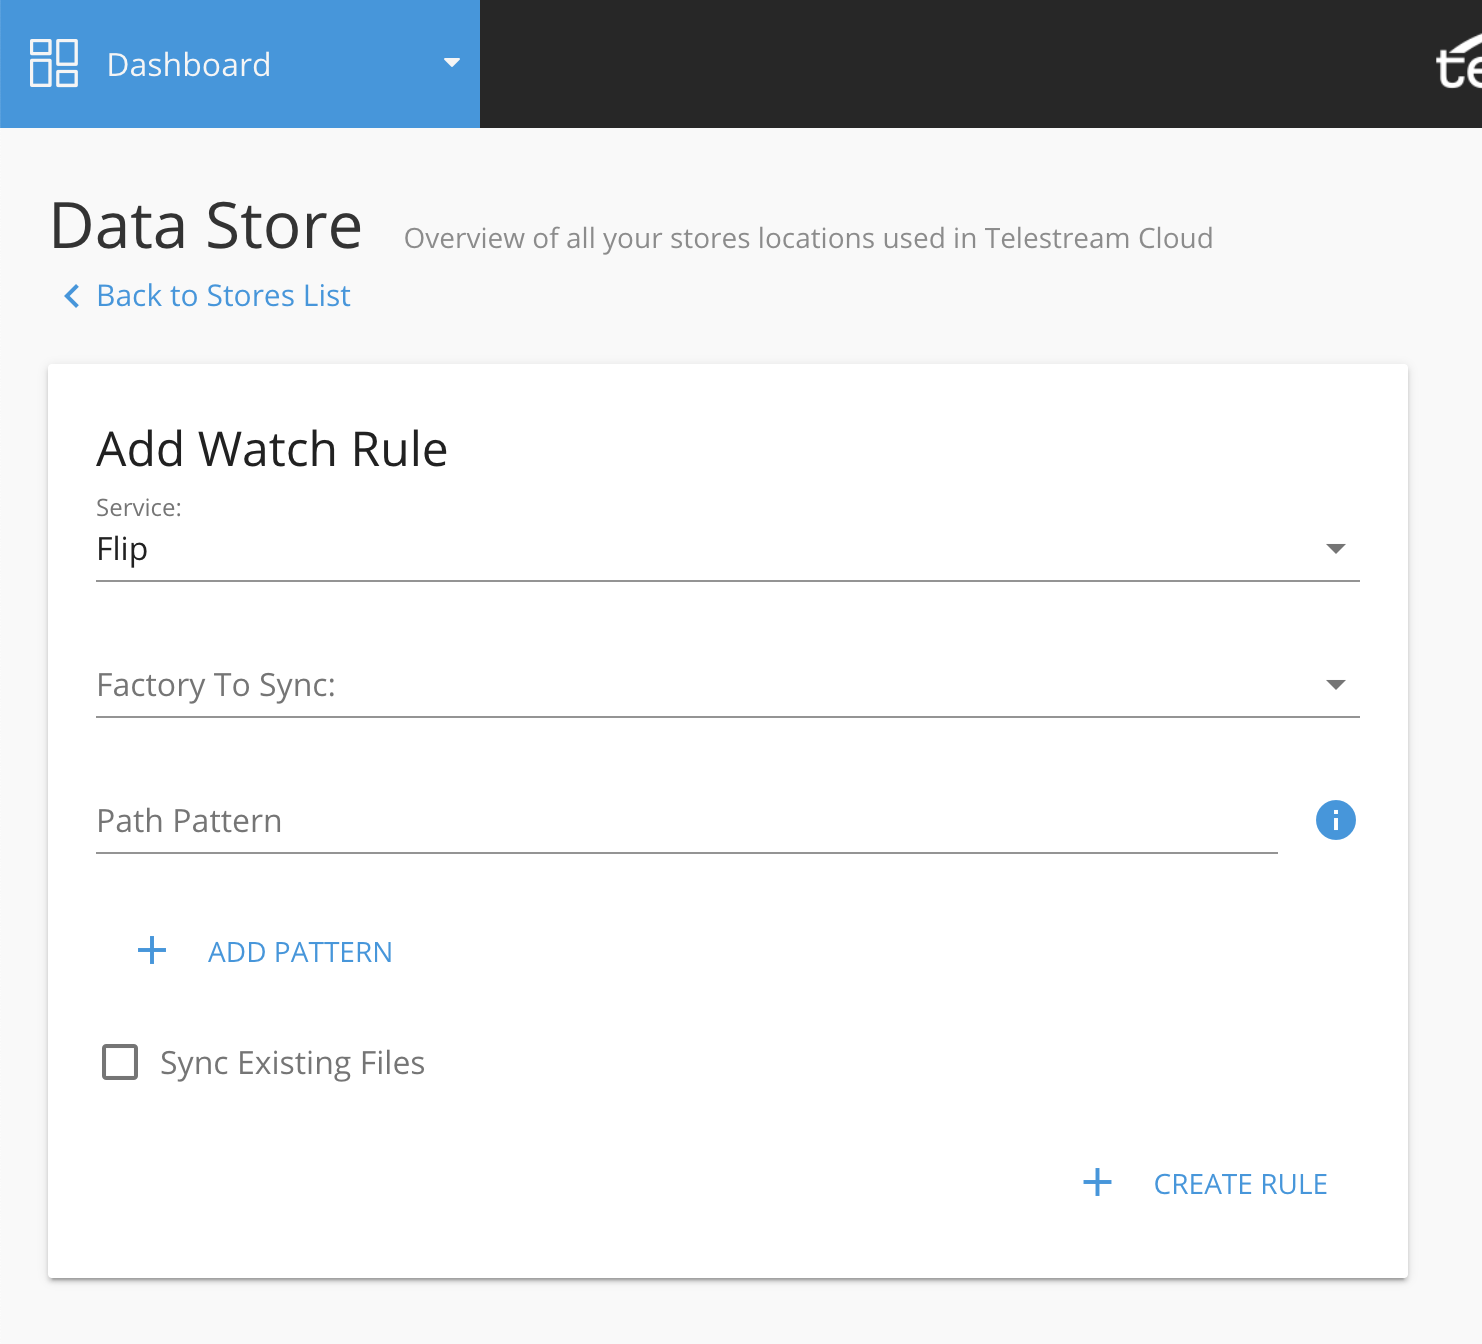
However, if you need more control over what files be processed you can use regular expressions to match specified file types or folders within bucket:
- match only files of certain type to be processed:
*.(mxf|mp4) will match any file with mxf or mp4 extension - match certain file types in specific folders within the bucket:
folder/${dir1}/${dir2}/.mp4* - match video and captions files from different folders:
folder/${dir1}/${dir2}/${name}.mp4
folder/${dir2}/${dir1}/${name}.scc
You can create multiple patterns for each watch rule.
If you have exiting files already in the watch-folder and you'd like to process them, check "Sync Existing Files". Be careful though, as this will automatically trigger jobs. If you have large amount of files to process this can be time consuming.
Click "Create Rule" to add it to your watch-folder. All you need to do now is to upload your first source file to the Azure watch-folder container.
Updated over 3 years ago
