Submitting a Job
Once a workflow has been uploaded and the desired revision specified (if any); the workflow may be utilized as the target of a new job.
To submit a job to a workflow, the ‘Submit Job’ button is utilized. The Submit Job button is illustrated in the image below for a given workflow:

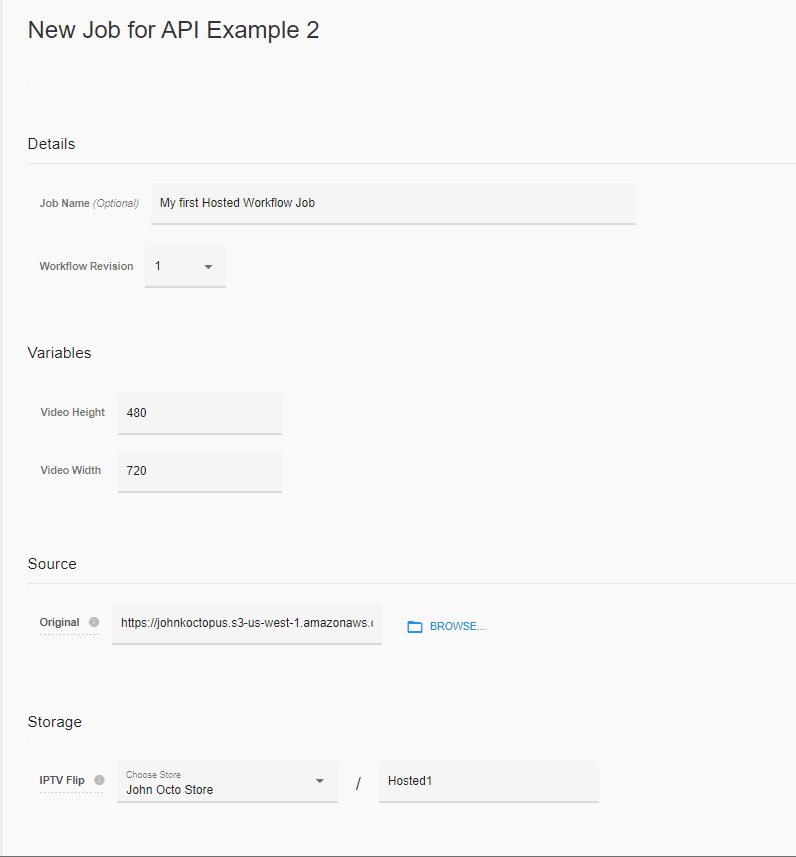
When the Submit Job is pressed, the user will be presented with a view in which all the information required to submit a job to this workflow shall be specified.
This includes specifying the value for any variables, specifying the source of the nickname(s) expected by the workflow and specifying the Storage locations for each action which requires storage.
The following corresponds to what is presented for the workflow previously uploaded:

A value has been entered for the ‘Job Name’, values were entered for the expected variables; a URL to a source file was provided (HTTPS Signed URL). Finally, a storage was specified for the IPTV Action in this workflow.
A few notes about these parameters:
The Job Name entry:

Allows the user to enter a text string which will be displayed in the job list for this workflow.
The Source section will contain a single entry for each expected nickname for the underlying workflow.
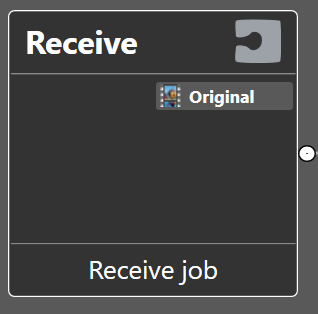
Recall that the original workflow in Vantage started with a Receive action (which is REQUIRED). That Receive action was configured to expect a single nickname to be provided:

This corresponds to the entries listed in the Source section of the Submit UI:

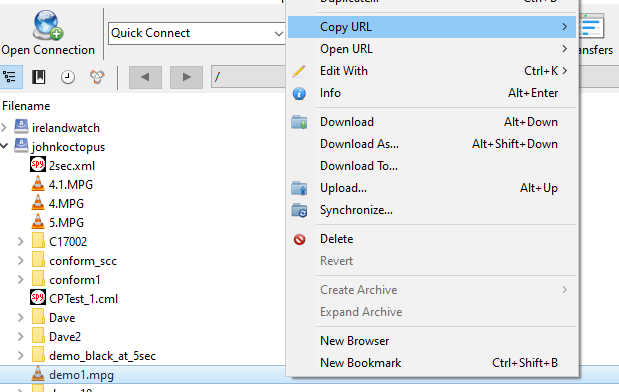
The entry in this field SHOULD be a Signed HTTPS URL. A Signed HTTPS URL is a special URL which allows access to a file in Cloud Storage (Google Cloud Storage, Amazon S3 or Azure BLOB Storage). The easiest way to quickly obtain a signed URL, is to use a product such as Cyberduck to generate a signed URL for a given file which resides in cloud storage. For example:

Cyberduck is utilized to attach to a specific S3 bucket, browse and select a file. Once the desired file is selected, the COPY URL option is used and the Presigned URL generation option is selected. The result of this is then copy/pasted into the ‘URL’ field next to the specific source input.
The Storage entry allows a user to indicate the final cloud storage location where the output of the action shall be placed (with an optional subfolder qualifier).
The value specified above:

Indicates that the previously created Cloud Storage entry: John Octo Store is the target of the IPTV Flip action in this workflow. Further, the value of ‘Hosted1’ indicates that a subfolder named: Hosted1 should be created (if it does not already exist) in the BUCKET/location defined in John Octo Store, and the result of the IPTV Flip will be placed in this folder.
Provider and Region
The specification of the Storage entry also defines the Provider and Region where this process shall execute. Please see the Cloud Storage section for details about this.
After the user is satisfied with the information which was entered, the ‘Submit Job’ button is pressed and a new job is created:

Updated over 3 years ago
